Graham Mayor
... helping to ease the lives of Microsoft Word users.
 |
 |
 |
Many people access the material from this web site daily. Most just take what they want and run. That's OK, provided they are not selling on the material as their own; however if your productivity gains from the material you have used, a donation from the money you have saved would help to ensure the continued availability of this resource. Click the appropriate button above to access PayPal.
Bar Coded Label Creator for Word 2013 and Later
As recalled in the 'Background' in the panel on the right, the featured add draws on my Print Envelopes and Labels add-in, though here of course there is no envelope function. This is not an add-in to create address labels, but to barcode products etc., For example my local hospital uses bar coding for patient records, the code, affixed to an appointment card, also providing access to the patients' car park.
With Word 2013 Microsoft Introduced the capability of using fields to create CODE39, CODE128 and QR bar codes and version 1.2 of the add-in has been extensive reworked to use this capability to create the bar codes.
The add-in can be used simply by opening the template in Word and clicking the command button on the 'Mailings' tab of the Word ribbon, but it is intended to be used as a Word add-in. The zip file linked from the end of this page contains both a self extracting zip file which will attempt to install in the Word startup folder; and the template itself which can be installed manually in the Word startup folder.
If you have not changed the preferred
startup folder it can be located (in English language versions
of Windows) by typing:
%appdata%\Microsoft\Word\Startup
in the Windows Explorer Address bar and pressing Enter.
Close Word before installing to ensure that the add-in is loaded
with Word.
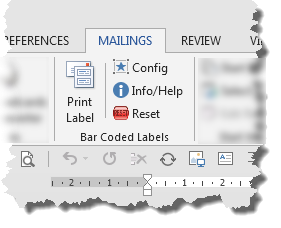
Before running the Print Label function, setup the add-in by clicking the 'Config' button. This allows the user to select the label size (from a range of labels provided - or you can create your own).
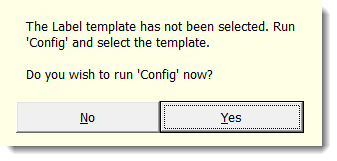
If you have not setup the configuration, you will be promoted to do so when you click the main button.
Create a label template
I have included templates for a selection of common label formats in the zip file. These can be saved to any convenient location and the paths added in the configuration dialogs. If you prefer to use a different format, it is a simple process to create a template using the many built in templates that Microsoft provides with Word.
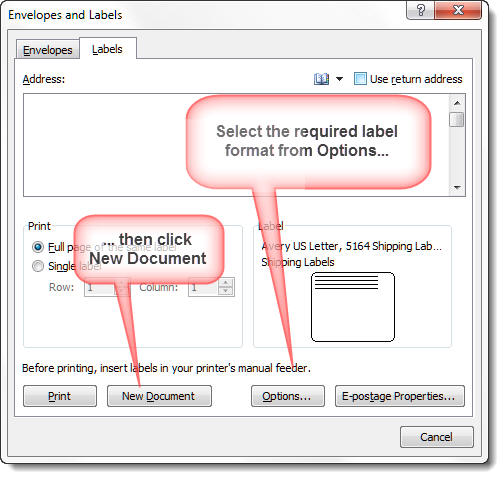
To create a label template, use Word's built-in label tool (see below). Select the required label format (or create a custom label) from Options, then click New Document. Save that document and apply the full path to the saved document to the configuration dialog.
Configure the add-in
The first page 'Labels' provides the options to select and configure the label.
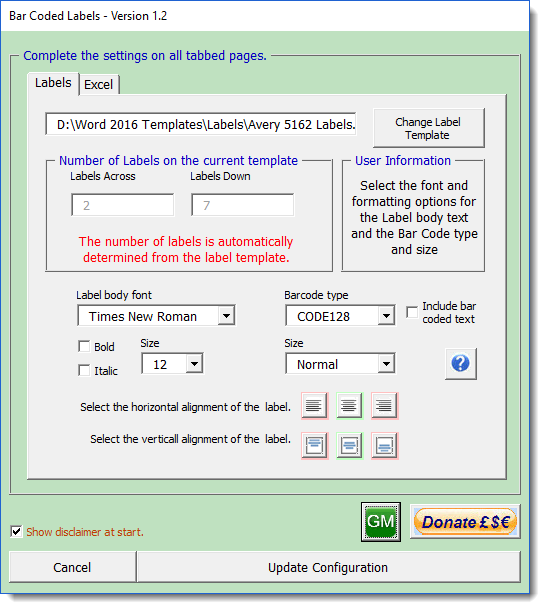
Choose 'Label body font' sizes applicable to the chosen label size. The add-in does not evaluate chosen fonts to ensure they will fit in the available label space. The illustration above shows the default settings which are suitable for the indicated Avery 5162 label pattern.
The label alignment is by means of buttons, the border colours showing which option is selected. i.e. green indicates the preferred choice. The default setting is not to include the bar coded text under the code (and is not in any case included with the QR code type) but you may check the box to include that text and the add-in will remember your preference.
All personal configuration settings are stored in the registry of the PC in which the add-in is installed.
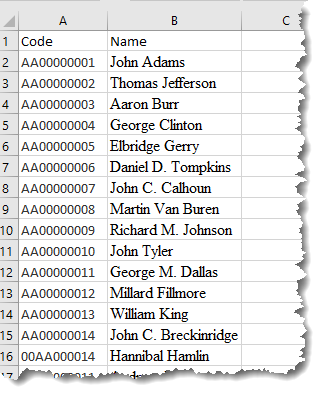
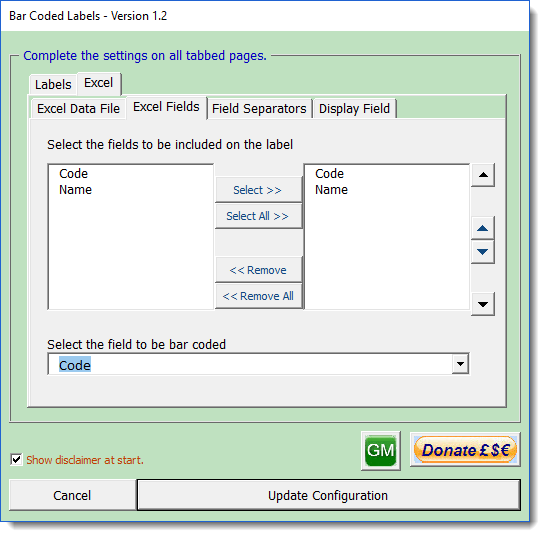
The second page 'Excel' sets the Excel data file from which the bar coded labels are to be created and allows the selection and positioning of the fields used on the label. You can use as many fields as the label text space allows. However the field containing the data to be converted to a bar code, must be pre-entered with the Barcode start and end characters.
This is easy enough to create in the data source by adding a new column, below shown as 'Bar'. (The illustrated data source, which American readers may recognise features US Vice Presidents) is included for experimentation).
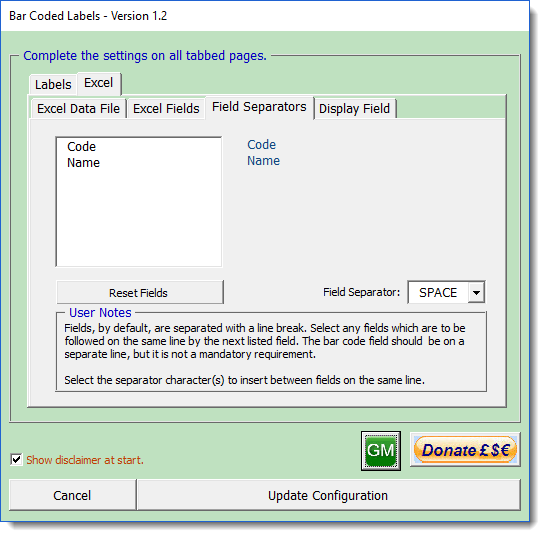
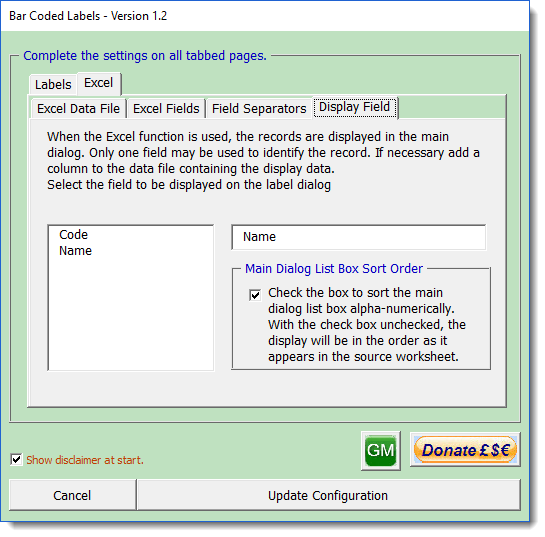
The sub pages of the Excel configuration are shown below:

Create/Print the labels
As the heading implies, the labels can be created i.e. as a new document, or sent directly to the printer. The main dialog labels reflect the choice so you may see at a glance, the current mode. The default is to create a new document and this option is the one that is not stored between uses. A new document allows the printing of multiple copies of the same label and provides an easy reference to ensure that the various sizes and field layout are suitable before committing the result to paper.
The Main Dialog

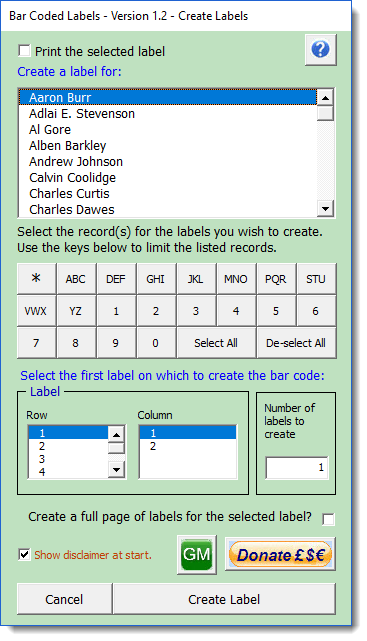
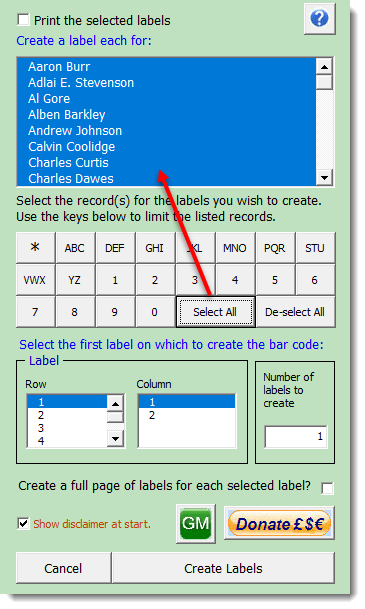
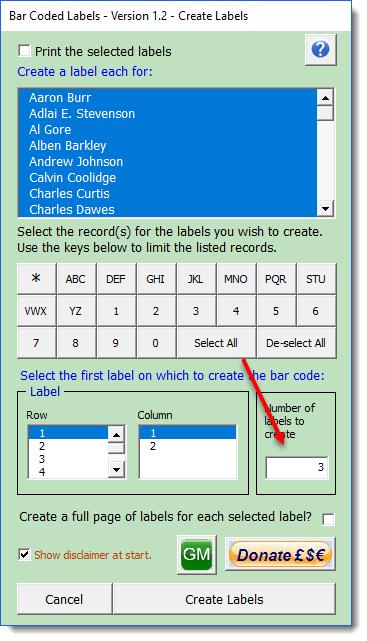
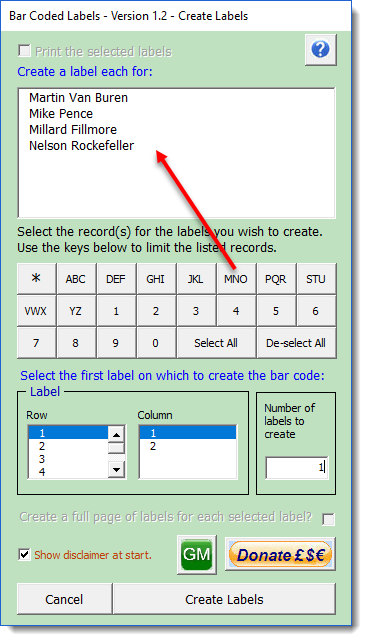
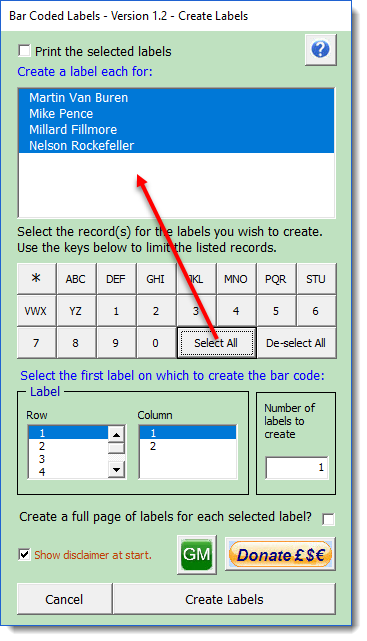
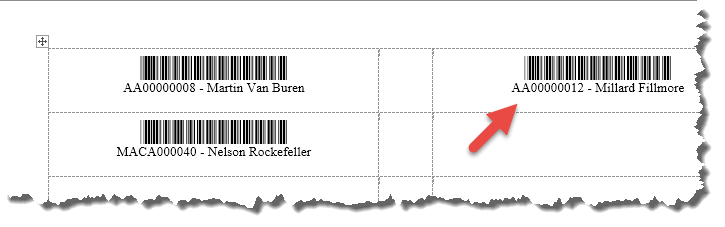
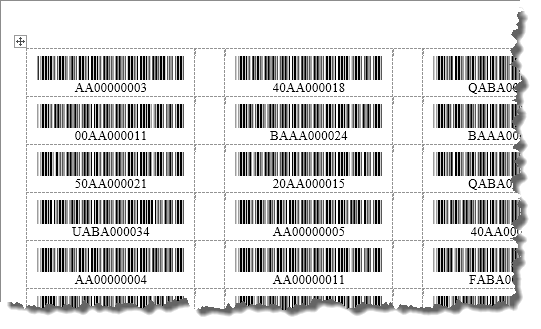
The Results
Below are illustrations of some of the effects that can be achieved

 -
Click here to download the add-in
-
Click here to download the add-in
Background
This add-in was inspired by a Word forum posting from a user who wanted to create bar coded labels from an Excel worksheet.
Mail merge would probably have done the job, but as I already had a function to print labels and envelopes, it was not a major leap to produce an add-in to create bar coded labels, using the core logic from that earlier add-in, though in practice it was not quite as simple as I had foreseen. The results are described opposite.