Graham Mayor
... helping to ease the lives of Microsoft Word users.
 |
 |
 |
Many people access the material from this web site daily. Most just take what they want and run. That's OK, provided they are not selling on the material as their own; however if your productivity gains from the material you have used, a donation from the money you have saved would help to ensure the continued availability of this resource. Click the appropriate button above to access PayPal.
Mail Merge Charts from Excel Data (Part 1)
Note that some illustrations may be from earlier versions of the add-in.
Word does not have any inherent ability to mail merge charts. This add-in gets around that by using an Excel data source for the merge process, in conjunction with a Letter type mail merge document. The charts themselves are created in Excel and copied to a bookmark pre-inserted in the document.
The add-in is extensively error trapped to warn the user when the merge conditions are unsuitable, and will attempt to correct some basic issues. Context sensitive help is provide throughout to try and make the process as painless as possible.
The add-in comes in the form of a ZIP file which contains both the template and an EXE format installer, which will attempt to put the template in the Word Startup folder (or you can manually install the template).
If you have not changed the preferred startup folder it can be located (in English language versions of Windows) by typing
%appdata%\Microsoft\Word\Startup
in the Windows Explorer Address bar and pressing Enter.
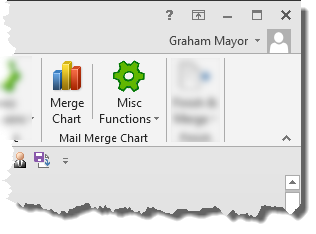
The add-in, when installed correctly, adds a pair of buttons to the Mailings Tab of the ribbon when Word is next started. The first button runs the process, the second provides access to supplementary functions. Those supplementary functions will be discussed at the end of this page.
The process needs to start with the Excel workbook used as the data source for the mail merge. This needs to have at least two named worksheets for use by the process. If either named sheet is missing the process will stop with a warning message.
The named worksheets will also require two named data ranges - one for the data that will be used in the chart, the other to determine which data record will be used in the chart for each merged document.
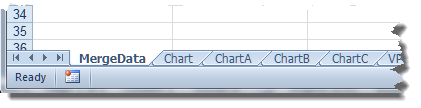
The essential worksheet names are:
- MergeData
- Chart (see yellow panel below)
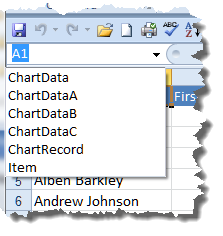
The essential named data ranges are:
- ChartData
- ChartRecord
If you wish to chart other aspects of the data, then you may add worksheets with names prefixed with Chart. Worksheet names that do not begin with 'Chart' are ignored.
Worksheet names used for chart data must
not contain space characters. Worksheets with names containing
spaces will be ignored.
Examples of valid names for this
process include:
Chart
ChartA
Chart2021
ChartProgress etc.
The 'MergeData' Worksheet
Here is where the list of records, used for the merge, is assembled. The merge will use one row for each document, so only charts that can be assembled from a single row of data, can be employed, The row must also contain any other ancillary fields required for the merge.
Note that the process involved is not mail
merge. Ancillary 'merge' fields are merely place markers and are
converted during the process to docvariable fields. Unlike merge
fields, docvariables cannot handle missing data, so where an
empty value is encountered, that value is replaced with a space
character.
If you require a true nul value then you must use a conditional
field in the document to create the value e.g. { IF { MERGEFIELD
Fieldname } = " " "" "{ MERGEFIELD Fieldname }"}
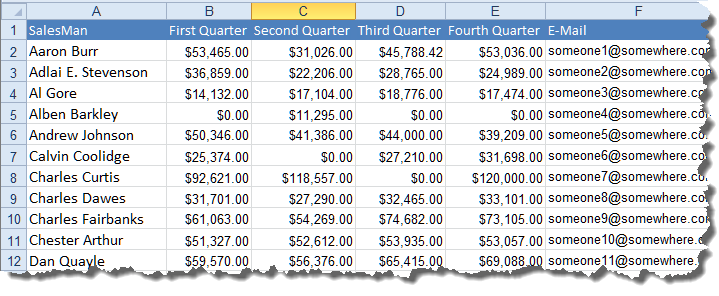
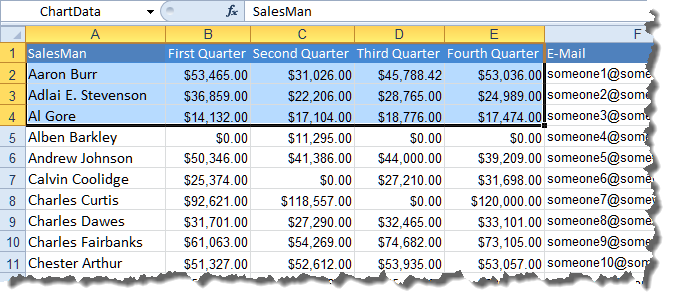
The add-in is packaged with example workbooks, which may be used to test, and for the user to become familiar with, the process. That 'MergeData' sheet uses a list of American vice president names, repurposed as 'salesmen' with some random sales quarterly figures that will be shown in a chart.
Word's own built-in mail merge function will code with missing column headers, and empty columns, but this add-in is only superficially related to mail merge, and cannot handle empty columns. The process will however detect empty columns, but will only merge the data to the left of the first empty column, and fields that use data from the right of the first empty column will show an error message on completion of the merge.
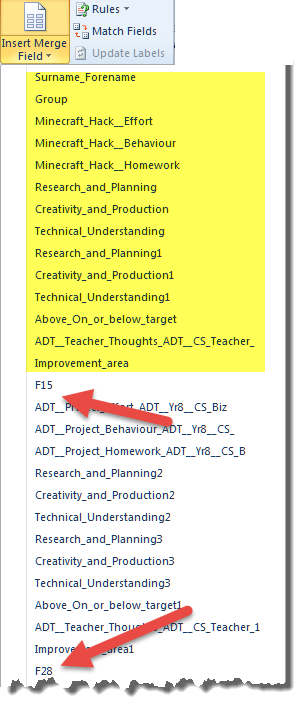
The simplest way to establish whether this will be a problem is to use the mailmerge insert field dropdown and look for fields named Fn where n is the number of the empty column. If the F numbers are at the end of the data file, then the add-in should be able to merge the required data. If they are numbered less than the total number of required columns, as in the following illustration, then only the yellow shaded fields are processed. Where subsequently listed fields are required for the merge, the process should be stopped and the data file should be corrected to lose the empty column(s) before completing the merge.
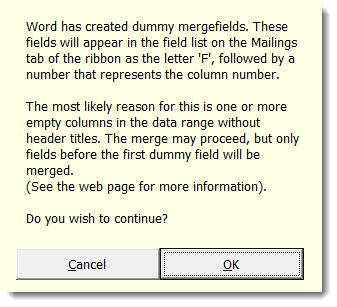
In both cases, the presence of the F numbered fields will trigger a warning message
Word's mail merge can only use field lengths of 40 characters and less, and will clip the field names to that length. If there are fields with duplicated names, then the mail merge will number those fields based on the frequency of the repeated names. Mail merge will also remove illegal fieldname characters.
The add-in will emulate what Word does to the field names, so the field names available to be selected may not accurately reflect the column headings.
The 'ChartData' range
The columns and rows to be used in the chart itself must be assigned to the named range 'ChartData'. The other columns and rows are not assigned to named ranges. In practice you need only assign the header row and a couple of other rows to test the chart production. The process will automatically add all the available data rows to the range, during its initial setup.
Multiple ranges may be named for use with multiple charts as shown in the example data files.

The 'Chart' Worksheet
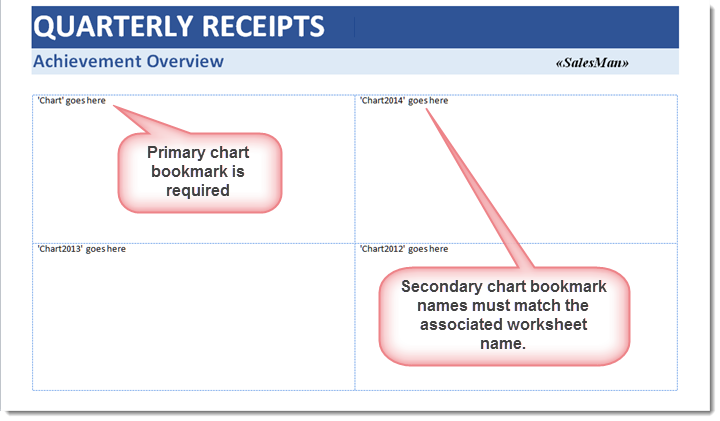
The Chart worksheet is where the primary chart is created:
The first or primary chart sheet must be named beginning with 'Chart', as this name is used throughout the code to identify the primary chart worksheet.
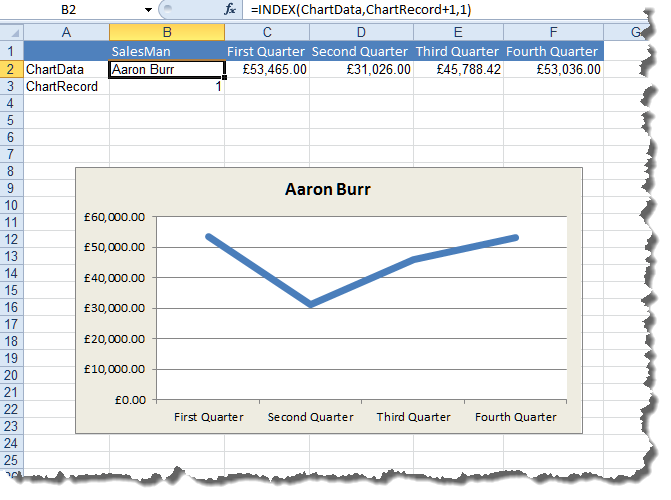
The worksheet comprises a header row, two data lines and the chart itself. The header row is simply linked from the header row of the ChartData range. The second and third rows use column A to provide a description of the row content. i.e. it reflects the names of the ranges used to populate these rows.
In Row 2, Columns B through to the last used Column have the following function:
=INDEX(ChartData,ChartRecord+1,n) , where 'n' is reflects the column number of the ChartData range, thus in the example worksheet in the above illustration, Column B would use =INDEX(ChartData,ChartRecord+1,1), Column C would use =INDEX(ChartData,ChartRecord+1,2), column D would use =INDEX(ChartData,ChartRecord+1,3), etc.
In Row 3, Column B contains the number of the row of the ChartData range that will make up the chart itself.
Where multiple charts are to be used, always refer the active record number to ChartRecord from the primary chart worksheet.
The Chart
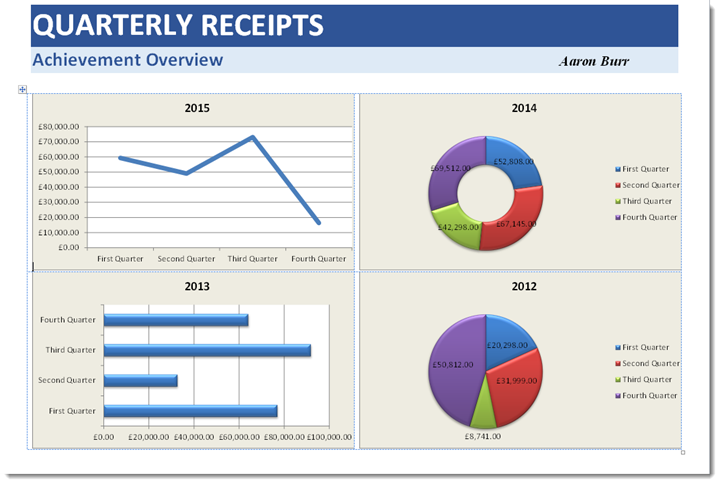
Excel can produce a vast array of chart configurations. The chart, based on that first data row, can be any Excel chart that lends itself to charting a single row of data. I have used a simple line chart for the purposes of demonstration. The 'Tabl'e example file uses four different types of chart.
The Merge Document
As already intimated, the merge document must be a Letter type merge document and it must be attached to the Excel MergeData worksheet featured above.
The example document is supplied unattached to its data sheet. You must attach the data source to the merge document before using it.
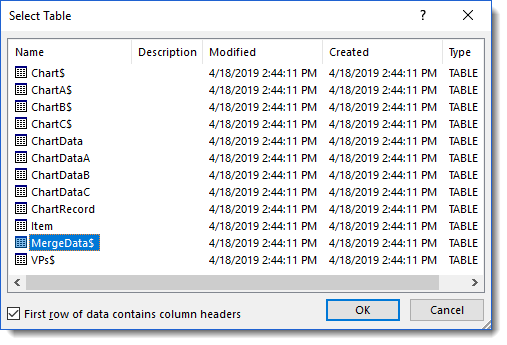
Save and close the Workbook and then from the Mailings Tab of the Word ribbon choose 'Select Recipients, and you will see a dialog similar to that below.
Worksheet names end with '$'. The only one we are interested in is MergeData$:
You may then add any fields and fixed text to the merge document.
Note that this add-in is not a true Word mail merge process. It uses merge fields inserted from the Excel data source, purely as place markers for the data in the document.
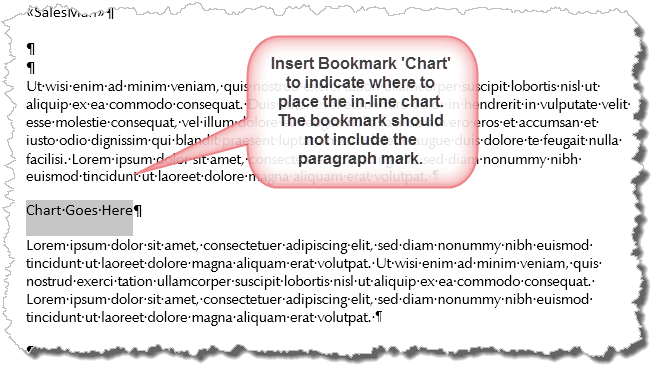
The Chart position
The chart will be inserted at a bookmarked location
or in a Rich Text content control.
The
bookmark name or content control title must match the name of the worksheet containing
the chart.
If there is no bookmark or suitable content control that matches
the chart worksheet name,
the process will be terminated.
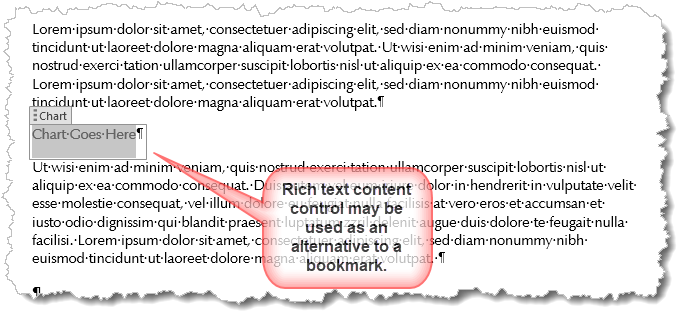
The example documents contain bookmarks appropriate for either
example worksheet. You may replace them with rich text content
controls if you wish.
If other bookmarks or content controls relating to supplementary charts are missing, the process will continue, but ignore those charts. The use of matching bookmark names with sheet names is the reason why there can be no spaces in the worksheet names. Bookmark names, unlike content control titles, do not support spaces.
The chart is inserted as an 'in line' graphical image, pre-populated from the data source. I would suggest inserting the image in its own paragraph, with the complete paragraph EXCEPT FOR THE END OF PARAGRAPH MARKER allocated to the CHART bookmark.
Use the ¶ button on the Home tab of the Word ribbon to toggle the display of formatting characters.
Save the finished document and you are good to go.
Note that bookmark names must be unique. Content controls don't have that limitation, so you may duplicate the content control if you wish to display the same chart twice.
Controlling the placement and size of the chart
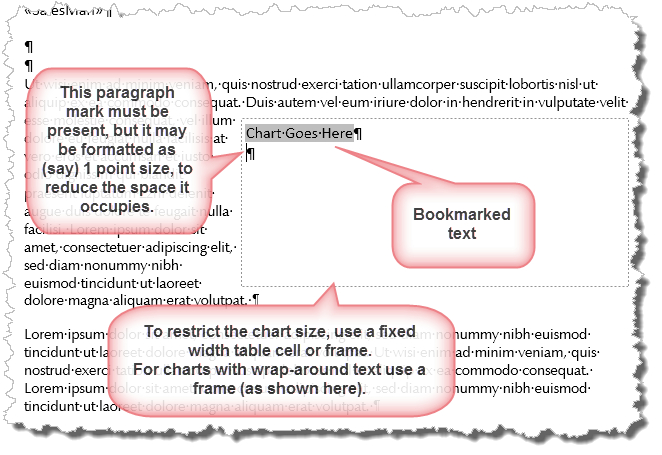
If preferred the chart may be inserted into a table cell. Use a fixed width cell to limit the size of the chart to the cell width. If using a table cell, there is no end of paragraph character to take account of, when adding the bookmark.
You may also insert the image into a frame. The frame command is not available by default, but can be added to the QAT (Quick Access Toolbar) or Ribbon from the All Commands Group of commands.
Frames make it possible to wrap the text around the chart. However there a a couple of provisos to merging charts into frames.
The first is that the frame must contain a paragraph mark after the paragraph containing the bookmark:
If the additional paragraph mark is missing, the process will now add the required paragraph break.
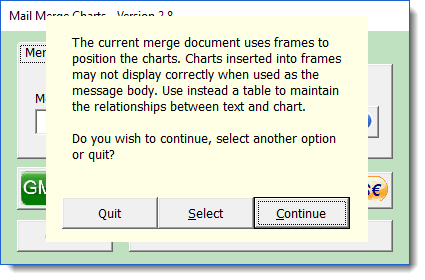
The second is that, if you merge to the body of an e-mail message, the frame is not going to remain where you place it.
If you select the option to merge to the message body and the merge document uses frames to hold the bookmarked locations, you will see a warning message that provides the option to quit.
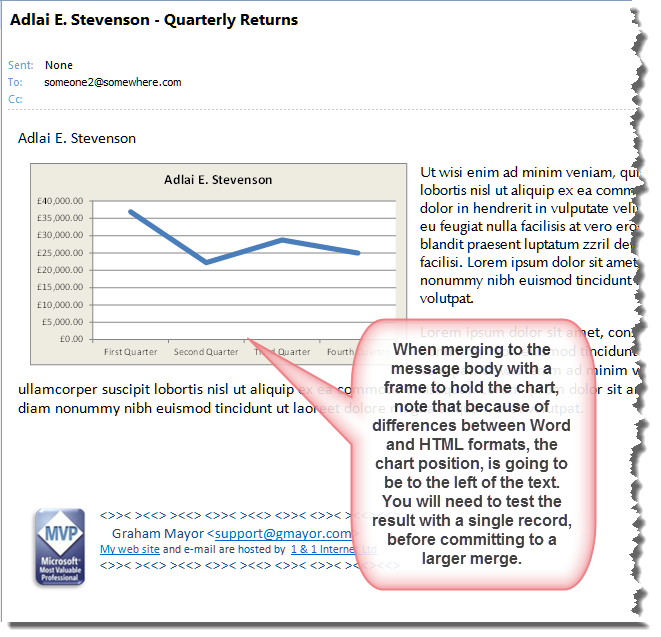
The illustration below shows the result of the above placement when placed in the message body.
This is not true of a merge to a document format, though again it is important to note that the frame will grow in height to accommodate the height of the chart:

Multiple charts example
Running the Merge to Charts Process
Click the Merge Chart button and the process will run a series of checks to establish that the conditions required to achieve a merge are correctly configured. If they are not, the process will stop and the user will see a warning message that explains why it has stopped and what is required for it to work.
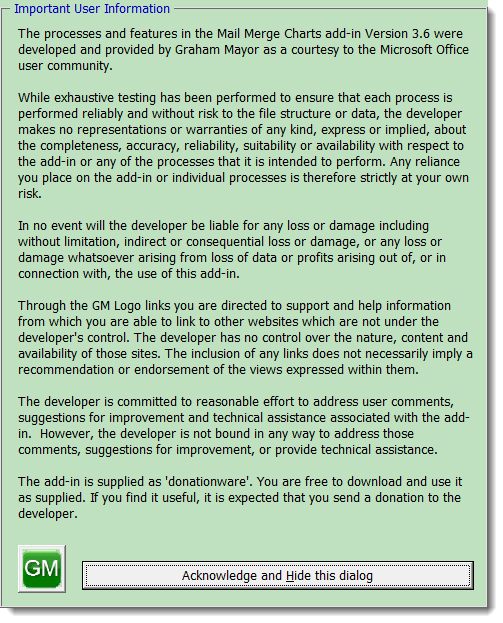
If all the checks are completed without issue, the first time the process is run (and every other time if the 'Show disclaimer on startup' check box is checked) the disclaimer text is presented. Please take a moment to read that text:
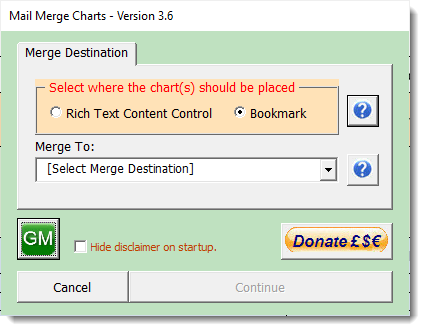
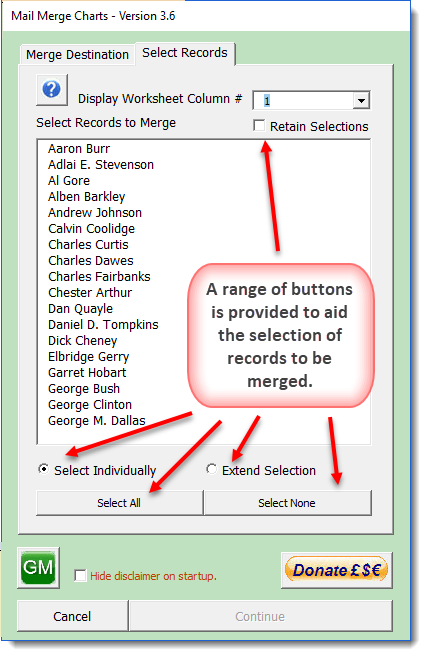
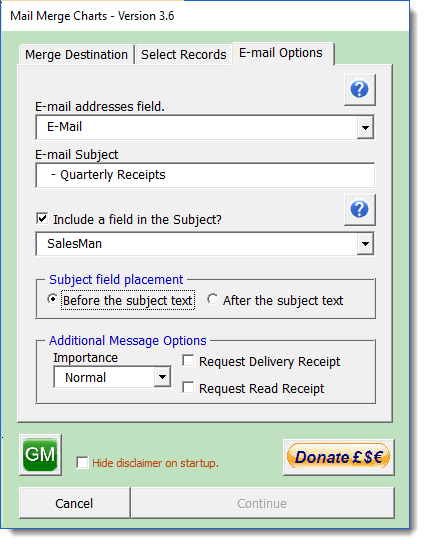
When the dialog is dismissed, the user is presented with a simple dialog that offers the mail merge choices. Note the tabbed pages of the dialog:
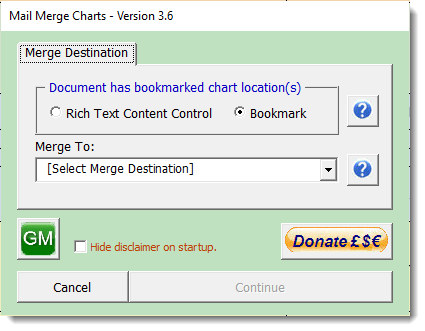
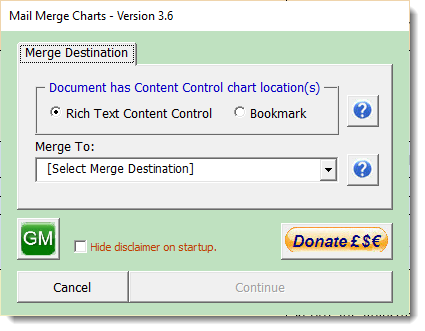
Where there is a compatible bookmark AND a compatible content control, only one type of receptacle may be used. By default the process will select the bookmark, option but will prompt to select which you prefer.
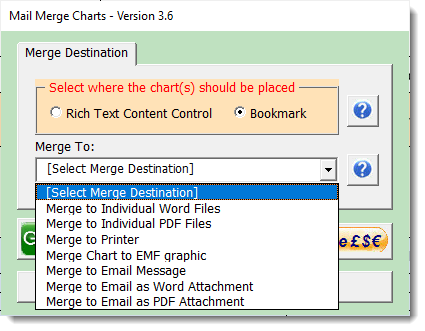
The options are self explanatory. The dialogs that follow will depend on which option is selected.
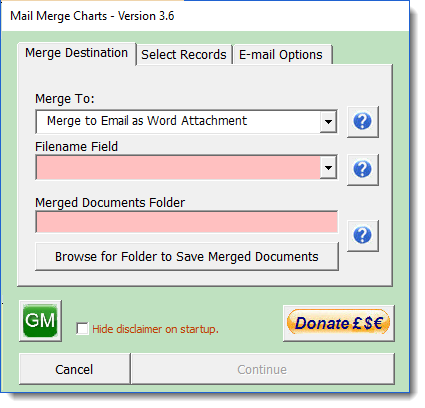
Merging to Word or PDF documents (whether attached to e-mail messages or not) will require a field to be used as the filename field and a folder location in which to save the documents.
The filenames are checked for illegal characters, which are replaced with underscores, and for pre-existing files of the same name. The process does not overwrite any pre-existing files, but appends a number after the name in brackets e.g. Filename(1).docx. If that name exists, then that number is incremented until the name no longer exists.
The 'Merged Documents Folder' is saved for re-use, until changed.
The 'Continue' button will not become available until all the required fields are completed.
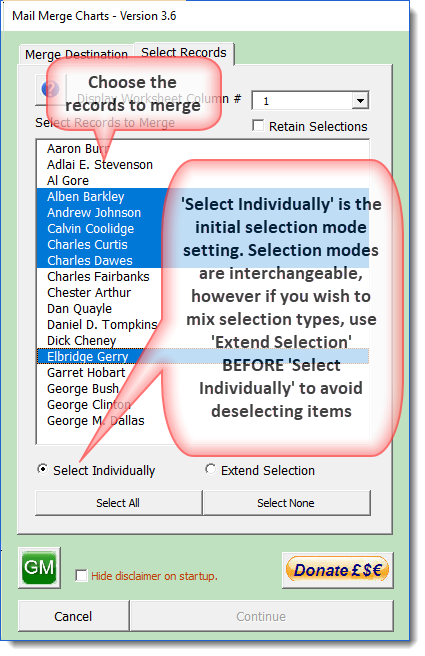
The second page provides access to the record selector. As this is not a Word mail merge process, selecting the records from the Mailings tab of the Word ribbon is pointless. ALL the records are processed, but you can choose which ones to merge from the 'Select Records' tab. If no records are selected, the process will prompt the user to do so.
Note that there is an option provided to retain selections. If this option is checked, and previous record selections are stored, there will be no prompt to select records, the previous selection will be used.
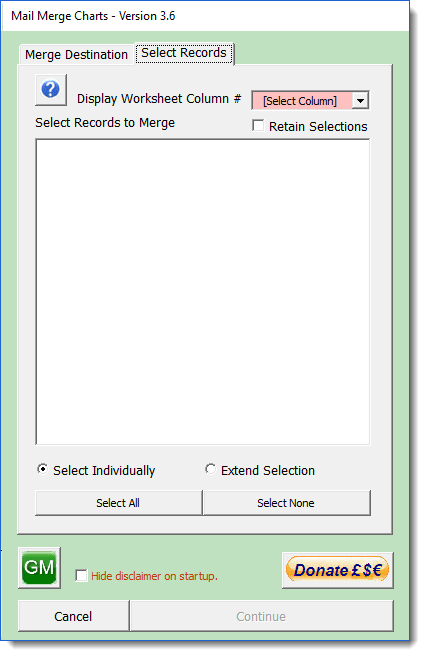
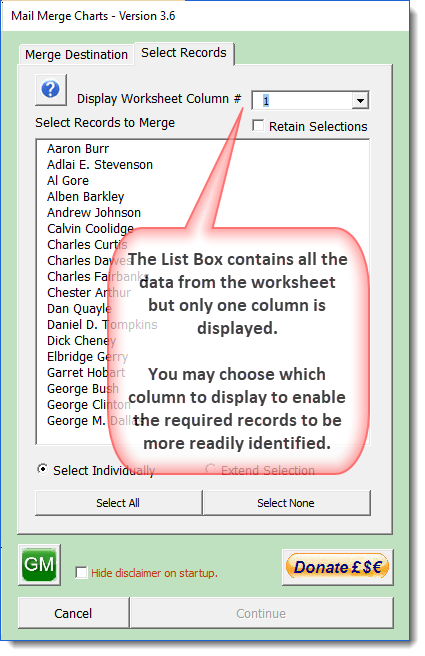
Before you can select any records, you must select which column of the data to display in the dialog. That selection is then retained.
The 'Continue' button becomes available when the required conditions to proceed are completed.
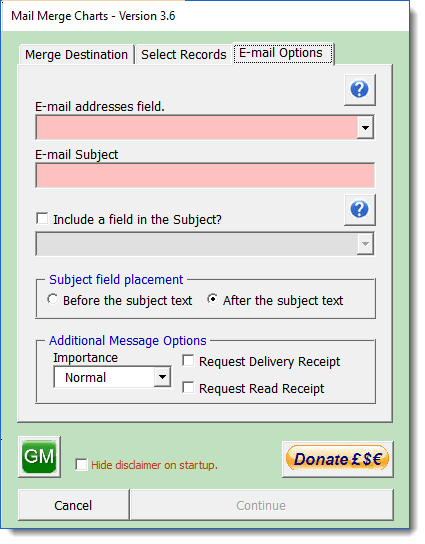
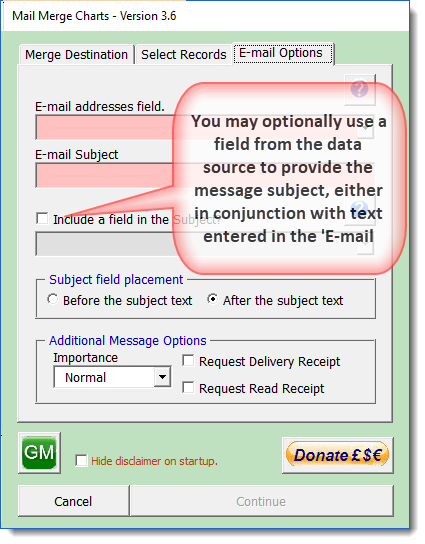
Merging to e-mail
When an e-mail destination is chosen, an additional page is presented to collect the information required to complete the merge. The merge may be as html or plain text, but the default is html. This is the better option as it allows the use of graphical signatures. The signature allocated to the default e-mail account for use by the merge, is always appended to the messages.
Message Body
When merging to the message body, be aware that html e-mail and Word document formats are different, and thus the message may not reflect how it looks in Word. Check with Word's Web view to get an idea of how it will look; and/or merge a single record to see how it will look as a message in the Outlook draft folder, before committing to a large merge run.
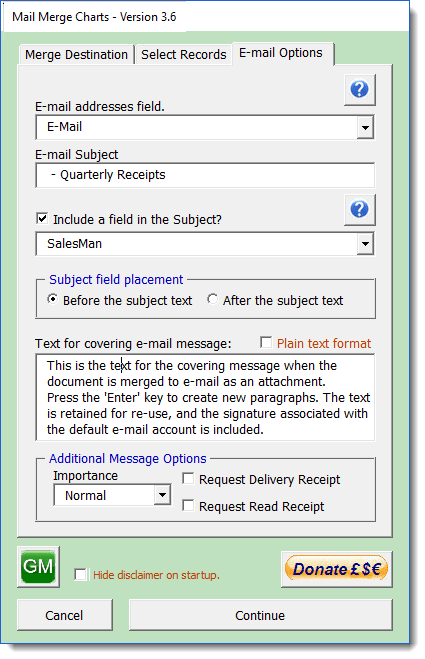
As Attachment
When the merge is as an attachment to an e-mail message, additional fields are offered:
Outlook
Messages to e-mail are sent to a sub folder of the default Outlook 'Drafts' folder, which the process creates for that purpose. That folder is called 'Merge Charts'.

Messages are never sent to recipients unless the Send Messages button on the add-ins ribbon menu is clicked. This action moves them to the Outbox, from where they will be sent, either immediately or when you click Send and Receive in Outlook, depending on the Outlook account configuration.
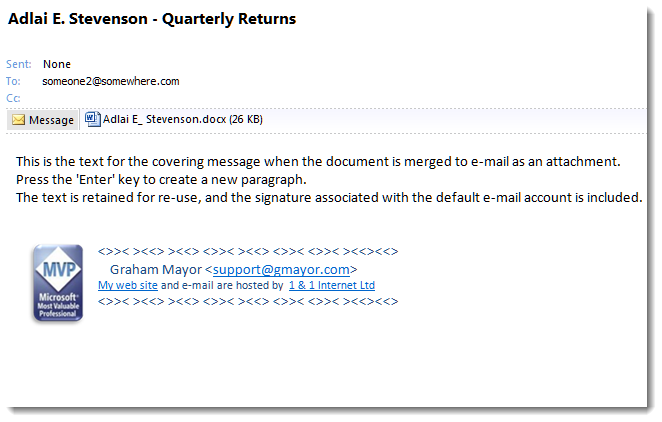
Merge to message with attachment:
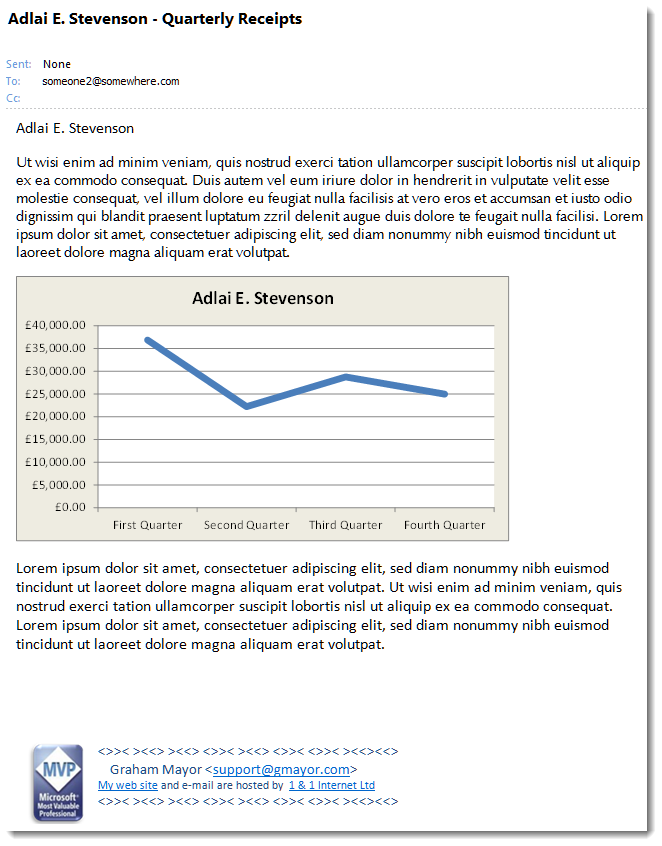
Merge to message body:
Additional Functions
The dropdown menu has four commands.:
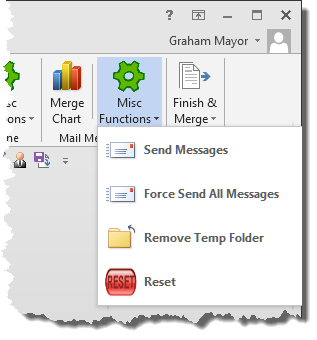
Send Messages: This transfers the messages from the Draft folder to the Outbox, whereupon, if Outlook is configured to send messages immediately, the messages will be sent. If Outlook is not configured to send immediately, they will be sent next time the user performs a manual 'Send & Receive'.
Force Send All Messages: Sometimes messages become stuck in the outbox and cannot be sent until they are opened and sent again. This button performs that task and then Sends & Receives ALL messages. This will occur for ALL messages in the Outbox and not just those related to the add-in. Messages in the Draft folder will; not be sent.
Remove Temp Folder: The add-in creates a temporary folder as a sub folder of the default Outlook 'Drafts' folder. This command removes that folder and any content it might have!
Reset: The add-in stores various configuration values in the Windows registry. This command will remove the registry entries, returning the add-in to its installation configuration. It does not remove the Outlook temporary folder. For that use the previous command.
 -
Now download the Merge with Charts add-in
-
Now download the Merge with Charts add-in
![]()
Chart Merge
I have been wanting to create an add-in for mail merging charts with variable data into a document or e-mail message for some time, but have been put off by the complexity of the task.
It is not so much that the production of the charts is especially difficult, but the error handling is a nightmare. However, after many hours metaphorically burning the midnight oil, I have now completed the task which is described alongside.