Graham Mayor
... helping to ease the lives of Microsoft Word users.
 |
 |
 |
Many people access the material from this web site daily. Most just take what they want and run. That's OK, provided they are not selling on the material as their own; however if your productivity gains from the material you have used, a donation from the money you have saved would help to ensure the continued availability of this resource. Click the appropriate button above to access PayPal.
Use a pop-up calendar to select and insert a date
In the following example the illustrations are from Word 2007, but the function will work equally well with earlier versions and the relevant dialog boxes virtually identical.
The calendar is a Word userform run from the macro below. If you are unfamiliar with using macro code examples, then first see my Idiots Guide to Installing Macros.
Sub InsCalendar()
frmCalendar.Show
End Sub
That macro, reproduced above, can be run from a toolbar button, or on entry to a form field (a legacy form field in Word 2007/2010)
Before you start
The function will require the installation of Microsoft's ActiveX Calendar Control, filename mscal.ocx. This was supplied in some versions of Office and so may be present, but if not, it is available from the downloads page of my web site.
mscal.ocx will not work with 64 bit versions of Office (but will work
with 32 bit versions of Office used on 64 bit Windows operating systems - see the
instructions included with the downloadable file package).
For those who cannot use mscal.ocx, Doug Robbins has made available
an alternative calendar function created entirely in VBA and
packaged in a template for use as an add-in or for use in your own
calendar projects. This calendar function is available from this
site, linked from the downloads page.
There is a third party substitute for mscal.ocx available from https://sites.google.com/site/e90e50/calendar-control-class which may also fill the void for 64 bit Office users, but I have not tested it.
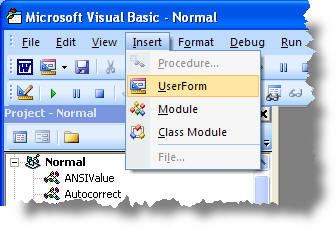
Open the vba editor (ALT+F11) and from the main menu select Insert > Userform
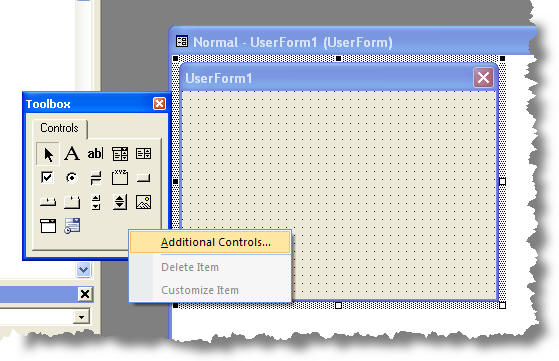
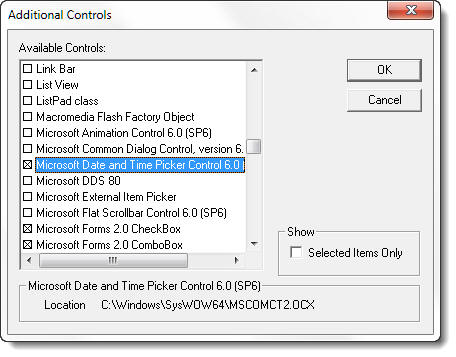
Right click the control toolbox and select 'Additional controls'
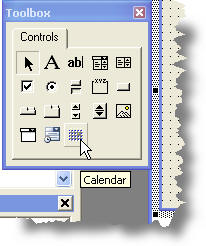
Locate the Calendar Control (the one shown below is the Office 2003 - Office 11.0 - version which may also be used with Word 2007/2010). If not present, mscal.ocx is not installed - see the note at the start of this section.

This adds the calendar control to the controls toolbox palette.
Create the calendar dialog
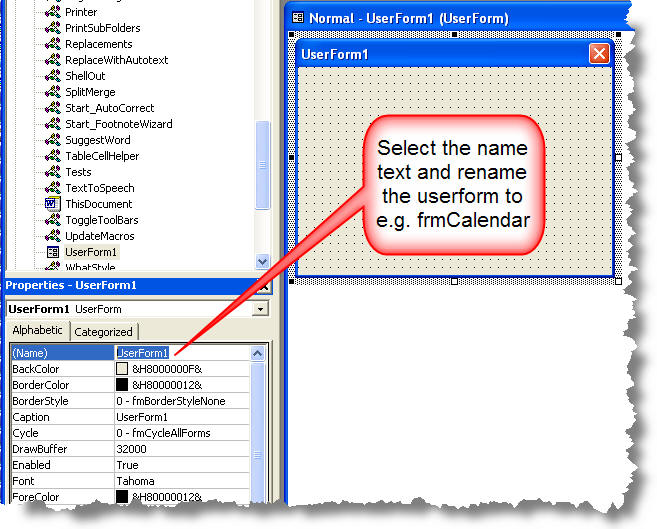
Change the name of the userform from UserForm1 to a meaningful name. I have used frmCalendar which you will see reflected in the macro that calls the calendar at the head of this page.
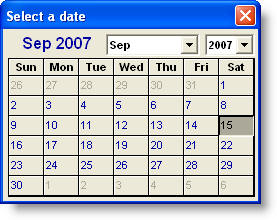
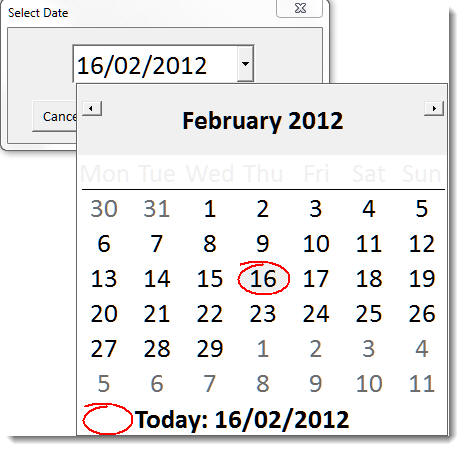
Then drag the calendar control from the toolbox to the Userform and drag the handles that surround the calendar tool to produce a calendar of the required size. Then drag the handles of the userform itself to remove the surrounding space to produce a calendar similar to that shown below.
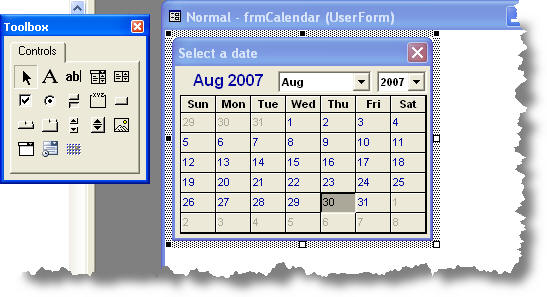
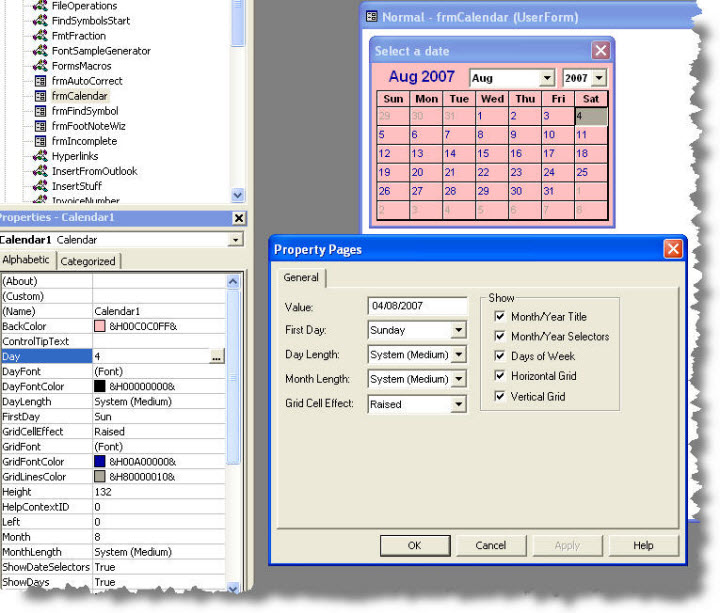
The layout of the calendar is user configurable e.g. click the calendar to select it then right click and choose 'properties'. You can play around with the various settings in the customisation dialog to give the effect you desire.
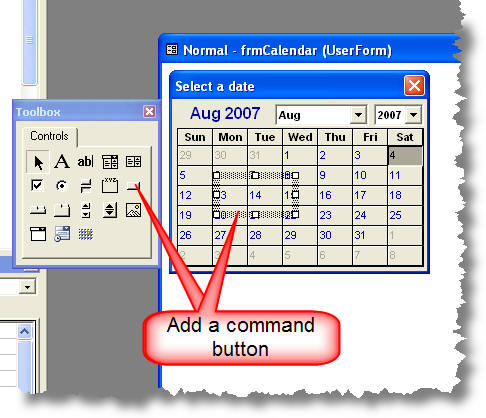
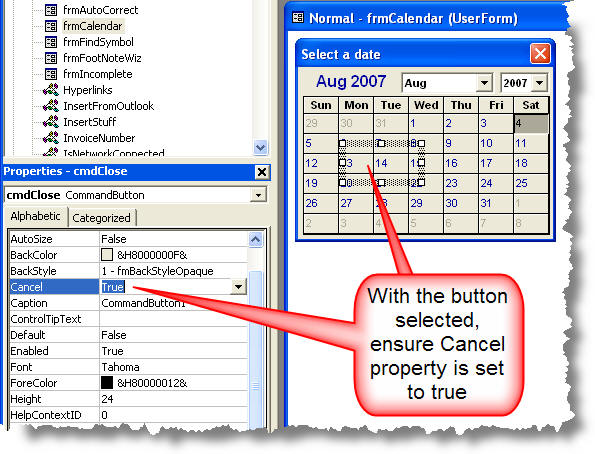
Add the vba coding to make it work The first requirement is to make the userform respond to pressing the ESC key on the keyboard, to close the form without inserting the date. To do this, add a command button to the userform with its cancel property set to true. This button doesn't need to be on view, so it can be located behind the calendar. It will be located behind the calendar by default, though its outline can be seen when selected - as in the illustration below.
Double click the 'hidden' button and the associated code dialog will open
Add the code associated with that button thus:
Private Sub CommandButton1_Click()
Unload Me
End Sub
You could have first renamed the command button to give it a more meaningful name, but we only have one button on this form and the default will do the job.
All that remains is to add the code to insert the selected date into the document. In the following example, the code inserts the date at the cursor, This is the type of code you would use if the calling macro (at the top of this page) was run from a toolbar button or keyboard shortcut with the current date shown selected.
Private Sub Calendar1_Click()
With Selection
.Text = Format(Calendar1.Value, "dd mmmm yyyy")
.MoveRight Unit:=wdCharacter, Count:=1
End With
Unload Me
End Sub
Private Sub UserForm_Initialize()
Calendar1.Value = Date
End Sub
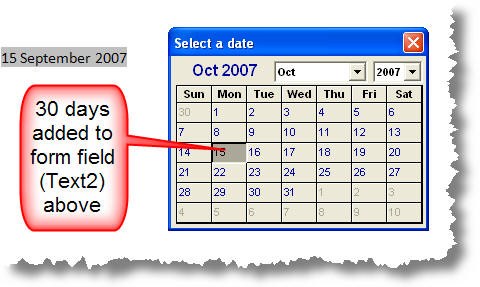
The next example is the type of code you might employ in a protected form. Here the calling macro is run on entry to a form field with the default name Text2. This calendar has an initial display with 30 days added to the current date and inserts the selected date into the form field.
Private Sub Calendar1_Click()
Dim oFld As FormFields
Set oFld = ActiveDocument.FormFields
oFld("Text2").Result = Format(Calendar1.Value, "dd mmmm yyyy")
Unload Me
End Sub
Private Sub UserForm_Initialize()
Calendar1.Value = Date + 30
End Sub
Date and Time Picker control
Programmers will also be familiar with the Date and Time picker, and may wonder why it may not work in Windows 7. This control, like the calendar control described above can be added to the UserForm tools palette - provided that the file that provides the date and time function is both present and registered in Windows. The Date and Time picker control is a 32 bit control and does not work with the 64 bit version of Office.
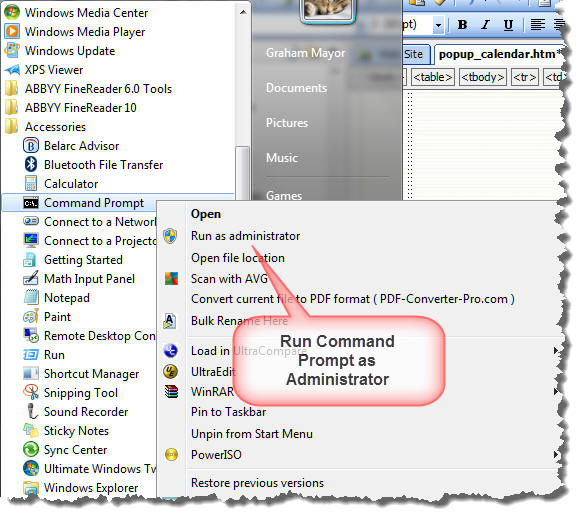
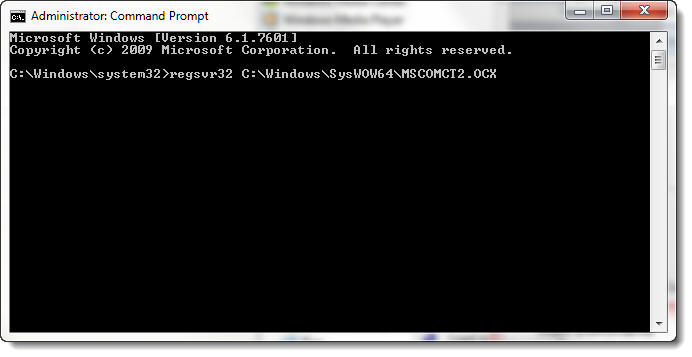
The file in question is Microsoft Date and Time Picker Control 6.0 (SP6) - MSCOMCT2.OCX. Chances are that for Windows 7 64 bit, the file can be found by searching the Windows sub folders. It needs to be copied to the folder C:\Windows\SysWOW64. Then locate the Command Prompt from Windows Start > All Programs > Accessories, right click and run as administrator.
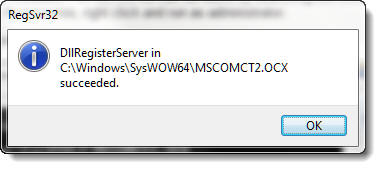
This will open a command prompt (DOS) window as shown below. Type in the command line regsvr32 C:\Windows\SysWOW64\MSCOMCT2.OCX at the cursor and press the Enter key. If you have done it correctly you will see the response below - if not you will see an error message.
You can then add the control to the palette as shown for the Calendar control at the top of this page.
The calendar control can be used to insert times and/or dates as shown in the following examples:
Date Control

The macro code shown below produces the UK format date with superscripted ordinal
Private sDay As String
Private sOrd As String
Private Sub CommandButton1_Click()
sDay = Format(DTPicker1.Value, "dd")
Select Case Right(sDay, 1)
Case Is = 1
If Left(sDay, 1) = 1 Then
sOrd = "th"
Else
sOrd = "st"
End If
Case Is = 2
If Left(sDay, 1) = 1 Then
sOrd = "th"
Else
sOrd = "nd"
End If
Case Is = 3
If Left(sDay, 1) = 1 Then
sOrd = "th"
Else
sOrd = "rd"
End If
Case Is = 4, 5, 6, 7, 8, 9, 0
sOrd = "th"
Case Else
End Select
With Selection
.TypeText Format(DTPicker1.Value, "d")
.Font.Superscript = True
.TypeText sOrd
.Font.Superscript = False
.TypeText Format(DTPicker1.Value, " MMMM yyyy") & vbCr
End With
Unload Me
End Sub
Private Sub CommandButton2_Click()
Unload Me
End Sub
Private Sub UserForm_Initialize()
Me.DTPicker1.Format = dtpShortDate
Me.DTPicker1.Value = Date
End Sub
Time Control
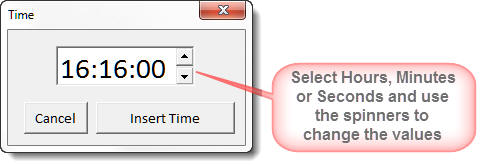

Option Explicit
Private Sub CommandButton1_Click() 'the insert time button
Selection.TypeText Format(Me.DTPicker1.Value, "hh:mm am/pm")
'insert the time at the cursor
Unload Me
End Sub
Private Sub CommandButton2_Click() 'the cancel button
Unload Me
End Sub
Private Sub UserForm_Initialize()
Me.DTPicker1.Format = dtpTime
Me.DTPicker1.Value = Time
'set to the current time
End Sub
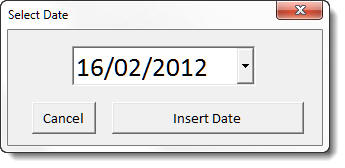
Insert a date
There are several web sources to be found that demonstrate the insertion of a date using a pop-up calendar. All those I have read are rather heavy going for the Word user who may wish to simply add a a calendar, from which he/she can select a date and insert it into a document or form field.
This page does not offer any new or innovative techniques, but hopefully I have been able to explain in simple terms with illustrations, how to prepare such a calendar for use.