Graham Mayor
... helping to ease the lives of Microsoft Word users.
 |
 |
 |
Many people access the material from this web site daily. Most just take what they want and run. That's OK, provided they are not selling on the material as their own; however if your productivity gains from the material you have used, a donation from the money you have saved would help to ensure the continued availability of this resource. Click the appropriate button above to access PayPal.
An Interactive Invoice Template for Word 2007 and later
This project was inspired by a newsgroup question about automatically incrementing invoice numbers, and began with a major re-edit of my web page on that topic. I then took one of Microsoft's standard invoice templates and decided to add a user interface.
It very quickly became apparent that Word is not the ideal vehicle for creating an invoice template. Access and especially Excel would have made things simpler, but once I got my teeth into the project, it became an obsession and took a couple of weeks of polishing and refining until I produced the template associated with this page. This template is essentially the template I use for invoicing my own private clients.
At some point during the process, I involved my good friend Greg Maxey, and it became something of an obsession for him too, and before long we were swapping files daily - and it was he who incorporated the use of an item pick list, to which I added the means to create the list, which he refined ... and so it went on, until after very many hours of work we got to the point that we think we have ironed all the wrinkles, and made it as idiot proof as possible, whilst still making it worth using ... we hope!
It is important to mention that Greg and I live on opposite sides of the world, so we each worked while the other slept, but the requirements of creating a template that was equally at home on either side of the Atlantic, meant that we were forever changing each other's date formats, spelling (the footer inconveniently includes the word cheques/checks) and page layout between A4 and US Letter. Not only that, but the coloured panels in the header/footer were misaligned with the table, when the page size changed.
This became a pain to deal with and so I introduced code to determine where the user was working and setup the form accordingly. (This was changed in later versions for a check box on the initial setup dialog).
The initial release for public consumption is numbered version 4. There have in fact been rather more than four versions, but only at suitable milestones did the version numbers become changed. In fact we started renumbering from zero when Greg became involved.
The Template!
The template is available in a format for Word 2007 and later versions only. I have no plans to create a version for Word 2003 (or earlier).
The template is packaged with a small sample item list. This list is merely for demonstration purposes. It is anticipated that users would create (or import) their own items lists into the same format. The template should be extracted to the user template folder (the one that contains normal.dotm). The data file should be stored anywhere convenient - ideally in the 'My Data Sources' folder - and attached from the template dialogs.
The template creates a text file in the My Documents folder called Settings.ini. If you have installed the mail merge splitter add-in, it will use the same settings file, without interfering with the operation of the add-in. Many of the defaults used by the template are stored in this file and presented for re-use when the next invoice is created from it.
The invoice contains a number of tables. Although the tables are user editable, any changes made to entries in the tables are likely to affect the many calculations used to maintain the totals and the cumulative amount of sales tax. All the changes that you may wish to make can be effected from the ribbon commands. As there is a rich collection of commands, the template adds its own ribbon tab, which it presents to the user.
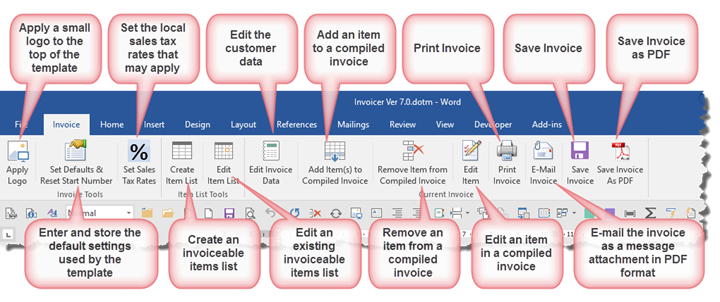
The first time the template is used (or any time the 'Set Defaults & Reset Start Number' button is clicked) the following dialog is presented to collect the user data, the invoice start number and format, and the path of an item list to aid the filling of the document. Only the fields marked with a red asterisk are mandatory.
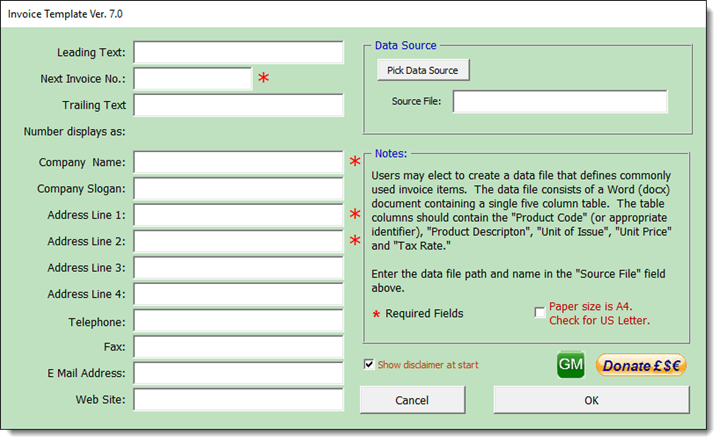
Tax Rates
Each country has its own rates of sales tax. The first time the template is used, default tax rates are supplied. You may change the defaults using the following dialog.
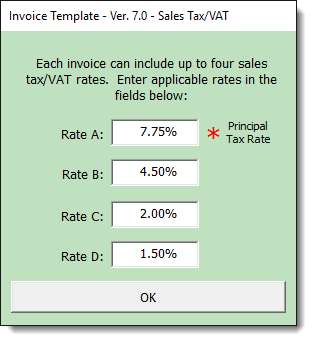
Set the invoice details
The next step is to complete the information pertaining to the invoice and contains the data required to submit the invoice to the client. If your customer addresses are stored in Outlook, they can be selected from that application.
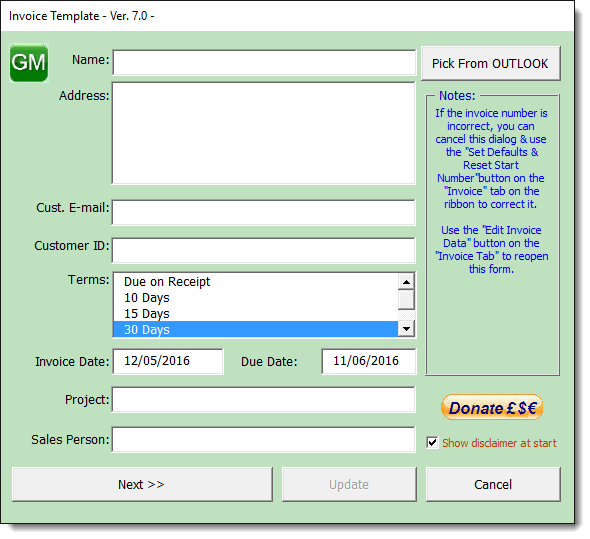
Item Lists
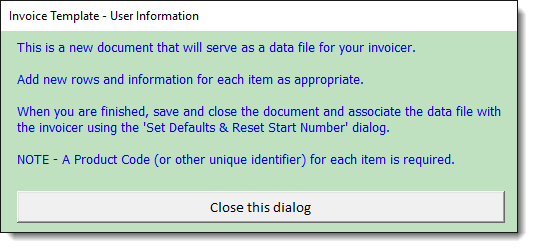
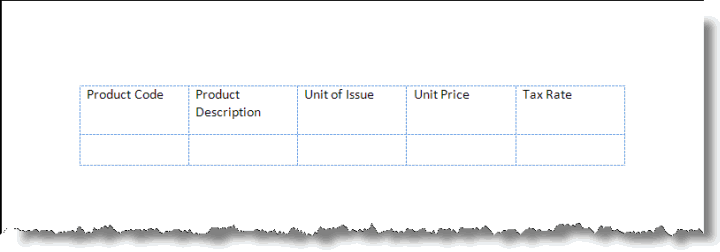
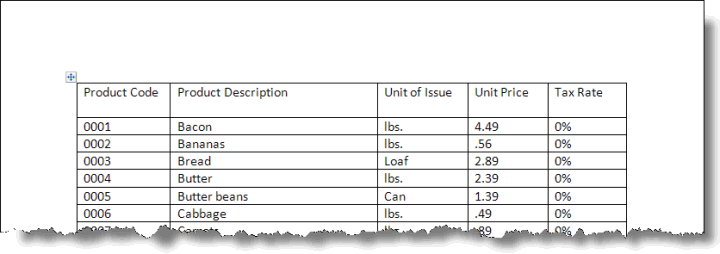
You can create (or edit) an item list as an aid to filling the invoiced items. A sample date file is included for testing purposes. The data file format is rigid. If your data is stored in another format, it should be possible to export it in a format that will match that required by the item list. Data sources created by the template are saved in the My Data Sources folder (a standard sub folder of My Documents) with the name "InvoiceItemsList.docx".
You can however use any Word document in the format shown below.
Add an item
The item list is used as shown in the dialog below. If there is no item list, the items may be entered manually into the form. Items manually entered are not added to the data table.
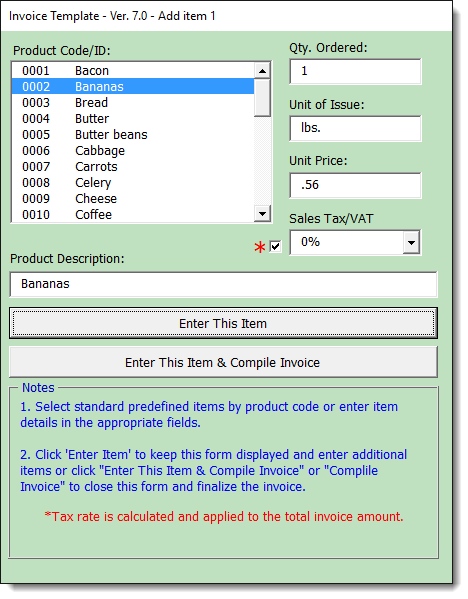
When the invoice is compiled, the individual taxes that apply are totalled. If you make a mistake you can use the 'Edit Item' button to make changes to any entered item. If you wish to add or remove an item, this too can be achieved from the ribbon and the item count and totals are maintained.
DO NOT MAKE MANUAL CHANGES to the body of the invoice document or the application will not be able to maintain the totals.
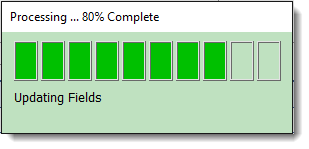
The invoice will allow two pages of entries. If the first page is filled a second page is added and the totals carried over. If items are removed such that the second page is no longer required, it is removed. The processing involved in moving items is complex and takes some time to run. Greg therefore added a progress bar.
There was some disagreement between us about the progress bar. I preferred a counter, to demonstrate to the user that something was happening, and we swapped between these two options several times. Eventually Greg came up with a version of the progress bar which more accurately reflected what was happening and so we settled on that.
Complete the Invoice
The final part of the process is to complete the invoice and send it to the client. To aid this there are options to save the invoice in a sub folder of the Word documents folder, named to reflect the invoice number; to print the document to the currently active printer and to e-mail the document as an attachment with a short accompanying message thanking the client for his/her custom.

 - Now download the template
Invoice
Greg Maxey with whom this template was developed, has produced his own version, which leans heavily on the code and format used here, but has some different ways of doing things.