Graham Mayor
... helping to ease the lives of Microsoft Word users.
 |
 |
 |
Many people access the material from this web site daily. Most just take what they want and run. That's OK, provided they are not selling on the material as their own; however if your productivity gains from the material you have used, a donation from the money you have saved would help to ensure the continued availability of this resource. Click the appropriate button above to access PayPal.
Word add-in to merge letters to separate files
This popular add-in has undergone many
revisions. Please keep an eye on the What's New page for new
releases.
To avoid preparing a complete set of new illustrations to cover
minor changes in presentation, some of the illustrations shown will
be from earlier versions.
The add-in is provided in two versions: a dot format template intended to work with Word from version 2002 and 2003, and an XML format (dotm) template for Word versions 2007 and later. The 2007 and later version includes a few additional features, but otherwise the two versions are essentially similar.
The 2007 and later version should also compatible with the 64 bit versions of Word.
Users have reported issues with CSV files, when using this add-in, and the recommendation is to use an Excel data source where possible. But with a field count of over 256, this is not practical and so for the benefit of such users (and others who might like an alternative approach), I have prepared a companion add-in - Merge and Split - which has its own web page.
Alternative merge splitting tools available from this site:
Merge and Split
also includes an option to split documents (including PDF) that have already
been merged to a new single document.
Merge to Email which is the
name suggests is aimed primarily at merging to e-mail messages
(or attachments to e-mail messages) but because it can merge as
attachments, it can also split to documents including PDF without involving
e-mail. This add-in as the closest in operation to Word's
built-in mail merge functionality.
Many to One add-in can also
emulate mail merge, either to email or to documents or PDF, when used
in its one to one mode.
All of these add-ins (in fact all the add-ins available from
this site) may be installed without conflicts between them,
though in practice it would be better to choose the tool best
suited to your particular merge requirement.
It is possible that some third party add-ins may interfere with the operation of this add-in. If, for example, you experience a 4198 error, check that you don't have present an add-in 'ScanSoftPDF.dot' installed by Scansoft PDF Convertor Professional, which has been reported to conflict.
There are download links before the macros listings and at the end of the page, but please read the instructions first.
For earlier Word versions (97 & 2000) the macros included later on this page should provide an alternative means of splitting merge documents.
Extract the relevant template from the zip file to the Word startup folder, which by default can be found (in English language versions of Windows) by typing %appdata%\Microsoft\Word\STARTUP in the address bar of your Windows Explorer application or browser. If you don't have write access to this folder, ask your IT support to install it for you.
Extract ONLY the required template.
If updating from an earlier version of the add-in, remove the older version before starting Word!
The self extracting version of the add-in will do this
automatically.
It has been reported that while Word can handle a variety of merge
data sources, CSV format files can be problematic for this add-in. If you are using
such a data source, and find that only the first record is created
as a document, converting the CSV file to Excel
could be beneficial.
If you experience a problem with the add-in, do ensure that you have the latest version before reporting the problem,
and have read this page to ensure that you are using it optimally. The add-in is under regular development.
DO NOT use the add-in template as a document template for creating
merge documents!
The add-in is designed to save a letter merge document to separate document files for each record. It does this by creating a new document for each record.
It has been reported that with the previous version there may be a conflict if you have installed MathType by Design Science. If that still proves to be the case, temporarily disabling MathType should enable the add-in to be used.
Error Number 5640: If when attempting the
merge, you find that a document for only the first record is
created and the process crashes with an error number 5640, the
reason is almost certainly that you are using DDE to connect the
merge document to the data to preserve Excel formatting.
DDE is flaky at the best of times, so when using this add-in
ensure that you connect to the data source using the default
connection method and format the fields to provide the
appearance you wish using formatting switches -
https://www.gmayor.com/formatting_word_fields.htm >
Alternatively use
https://www.gmayor.com/MergeAndSplit.htm which
employs a different process to split the documents, that is more
tolerant of DDE.
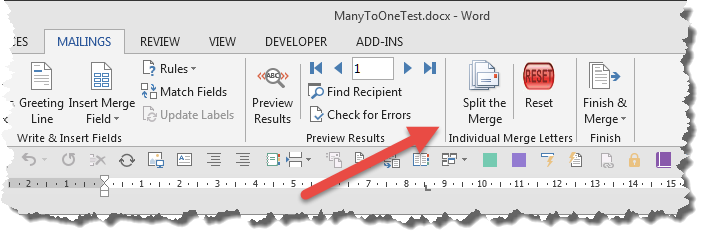
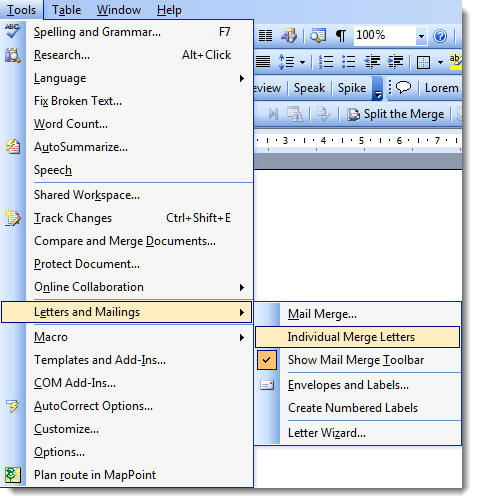
Command buttons are added to the Mailings tab on the ribbon of Word 2007 and later and to a custom toolbar in Word 2003. In Word 2003 the main command is also added to the Mail Merge toolbar and to the Tools menu.
Word 2007-2016 version
Word 2003 version
When updating with the latest version of this add-in, ensure that you reset the registry settings from the toolbar (see below) to ensure there are no conflicting values between versions.


When run, the macro checks for fatal errors and will produce self explanatory messages, should such an error be apparent.
Running the Split Merge function
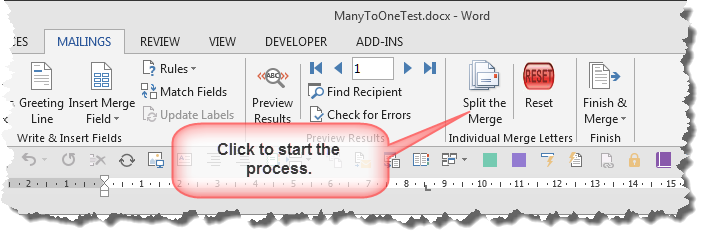
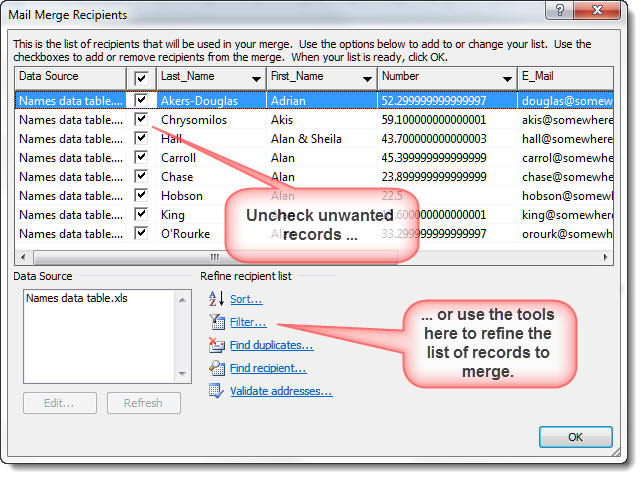
The first dialog is the option to select which records you wish to merge.
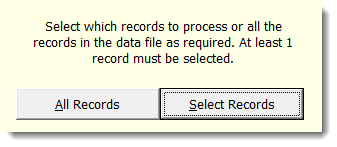
Clicking 'Select Records' displays the Word built-in Edit Recipient List dialog
The first time the add-in is run, and each time until the check box on the main dialog is unchecked, the following dialog is presented when the ribbon buttons are clicked.:
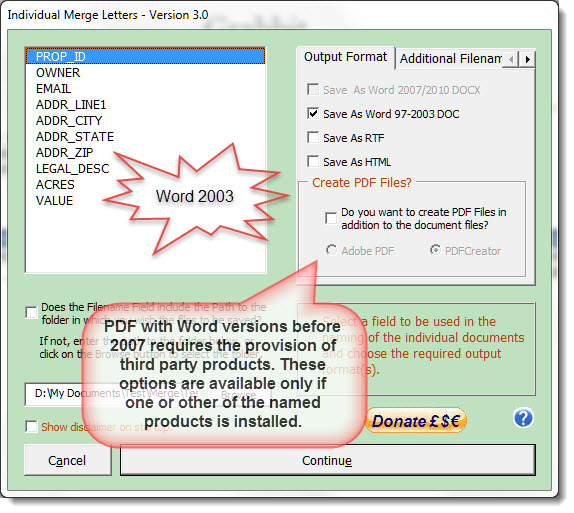
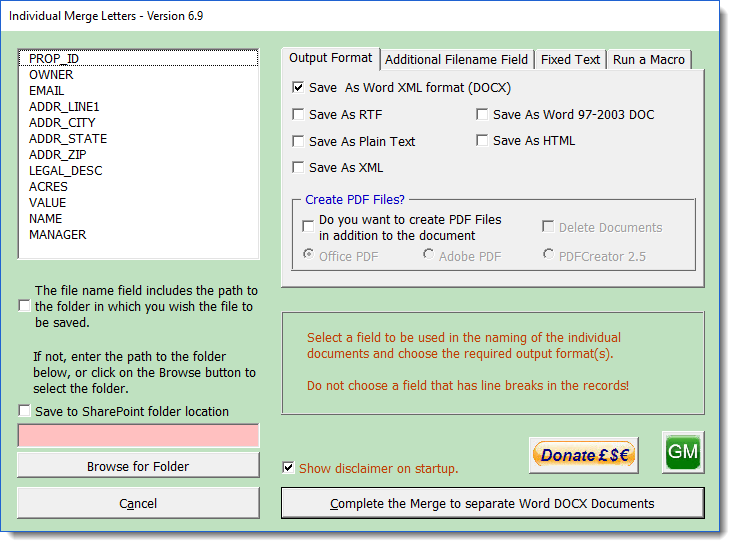
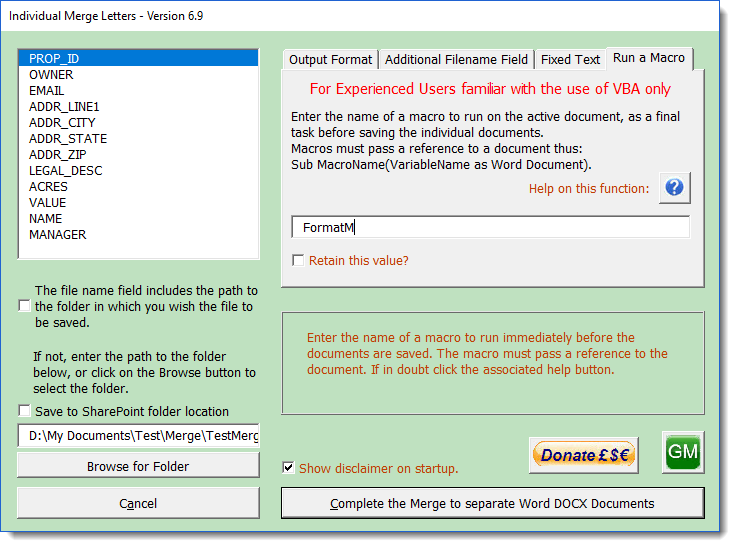
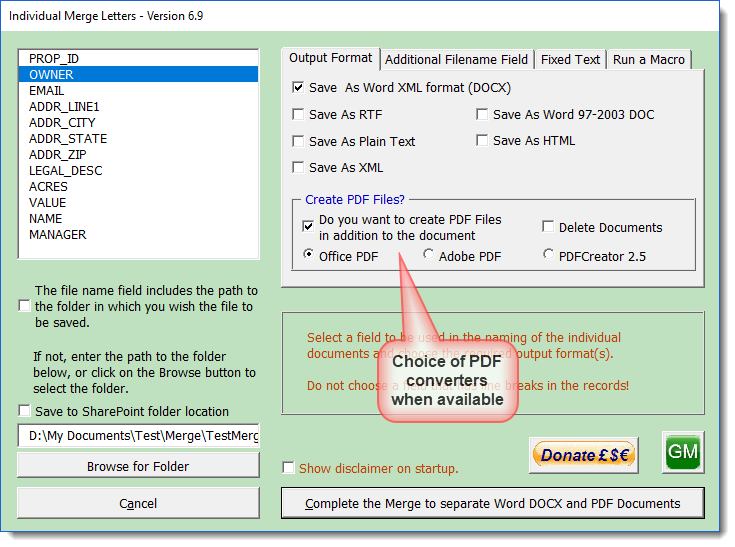
The add-in version offers the user the choice to save the split files in one from a variety of formats.
If the filename field contains the path to the folder in which you wish the files to be saved, check the checkbox. If not, enter the path in the dialog box where indicated.
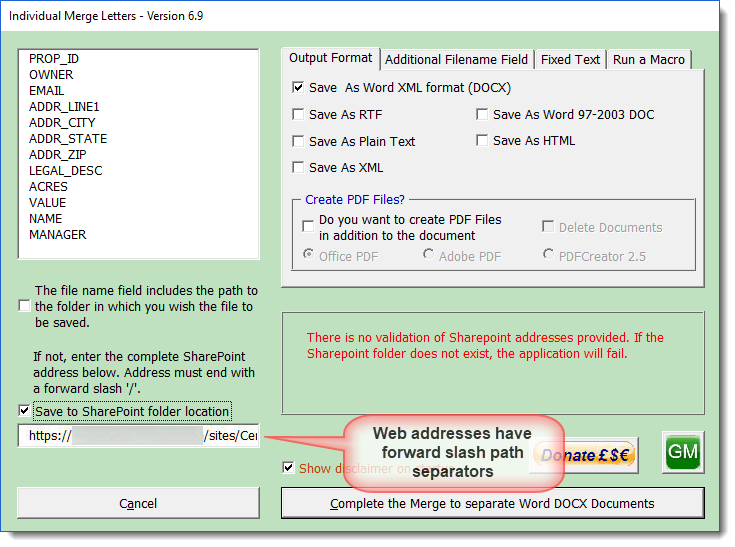
Where the field contains the path(s) and any defined path does not
exist, it will be created. This option is not currently available
for Sharepoint addresses. An invalid Sharepoint address will cause
the process to fail.
Records that contain line breaks
If your data contains line breaks within one or more cells, then frankly this should be avoided.
Prior to version 3.4 one or two users reported had occasionally thrown a 5487 error warning. I knew it was related to file naming, but have never been able to repeat it until a user with this problem sent me a data file to check against a merge document. It immediately crashed with the 5487 error. I established that the problem related to a line break in a field used for file naming. Clearly you cannot have line breaks in file names.
Having established the problem, handling it proved far from simple, so I ended up re-writing the whole of the file naming section of the add-in.
Where a line is split the filename only uses the part before the (first) split. This can result in multiple files potentially with the same name, so that has also been re-addressed. Where filenames would be identical subsequent file names have an incrementing number appended to the name e.g. filename(1).docx, filename(2).docx etc,
The Word 2007 and later version provides an additional option to save the merged documents to a Sharepoint location. If that option is checked, the browse button is not displayed and the label wording above the check box changes. Users may now type or paste a Sharepoint path into the dialog.
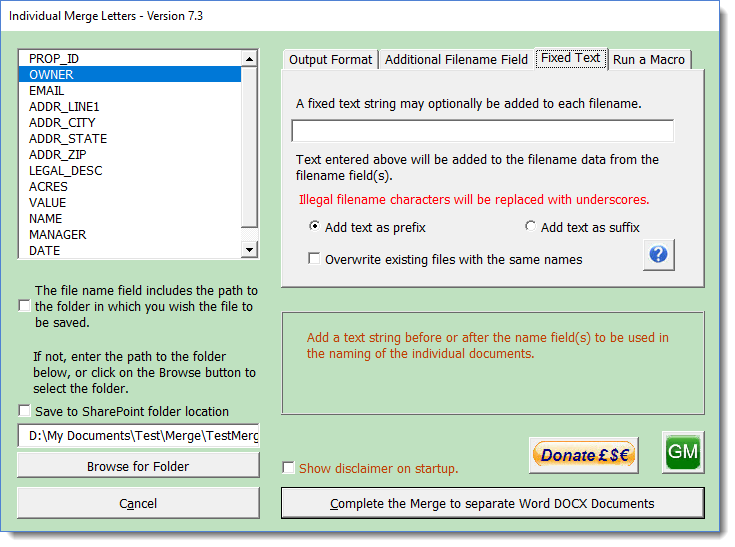
The main form has a tabbed section which provides the additional option to add fixed text to the filenames, either as a prefix or as a suffix (before the filename extension obviously). This text and the location are remembered by the application, so remember to clear them if merging a different document that does not require them. Where such text is used it must obey file naming conventions. Illegal filename characters will be replaced with the underscore character.
In response to user request, I have added
the option to overwrite existing matching filenames. To avoid
the need to make further extensive modifications to the userform
I have added this option to the ''Fixed Text' tab of the options
panel (see below)where sufficient space was available.
This option should be used with caution, as it is possible for
more than one split document to have the same filename. See the
earlier comment regarding the default method of file naming
where duplicate names result.
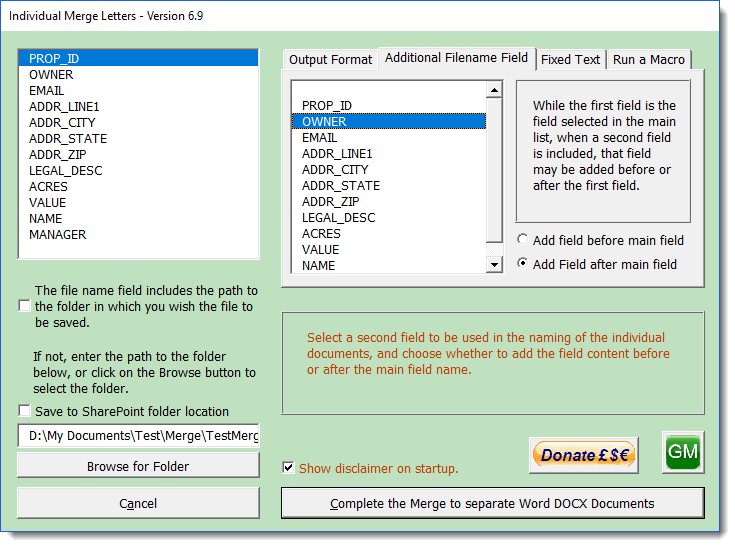
In have responded to popular request by allowing a second field to be included in the filename. This second field can be placed before or after the initially selected filename field and can be used in conjunction with the text string from the previous illustration, which can also be placed before or after the combined name fields.
As the field information is retained between uses of the add-in, I have added an empty 'field name' to allow the second field to be eliminated from the filename. To omit text strings from the filename, simply delete the content of the test string field. Where no second field/text string is selected, the option buttons associated with it perform no function.
No doubt someone will now come up with a suggestion to allow more than two fields or more than one text string. If you have so complex a requirement, use the ability to name the file from a derived field in the data source. Thus just about any legitimate filename structure can be achieved.
If the folder text box is left empty, in addition to the background colour of that text box serving as a warning, a message box also warns the user and pauses the process to allow the folder to be selected.

The add-in is provided as Donationware and allows payment in several currencies. The 'Donate £€$' button presents the following dialog.
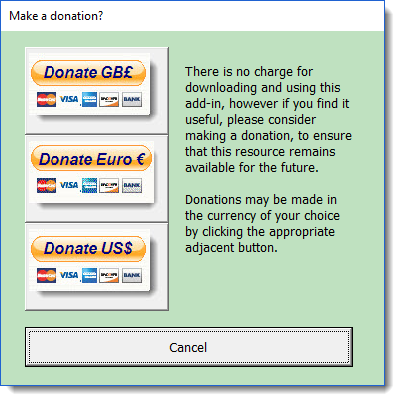
The 'GM' logo button returns to this web page
Run a macro before saving the documents
For Word versions 2007 and later, the add-in offers the option to run a macro on the separate documents before they are finally saved. This could, for example, be used to re-apply text formatting that had been applied to the data, but which would have been lost in the merge.
In order to ensure that macros applied to this process actually run on the document they must pass a document parameter to the macro e.g. Sub MacroName(oDoc as Document). The variable name itself does not matter. In the following code example, a ® characters are formatted with the Segoe UI font and are superscripted. (The sample document includes such characters so that you may evaluate the results).
Dim oRng As Range
Set oRng = oDoc.Range
With oRng.Find
Do While .Execute(FindText:=ChrW(174))
With oRng.Font
.name = "Segoe UI"
.Superscript = True
End With
Loop
End With
End Sub
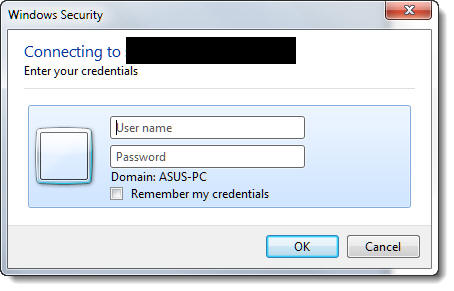
If the Sharepoint folder option is
selected, the Sharepoint path MUST be entered (preferably pasted
to avoid mistakes) into the dialog.
The user will be prompted for the Sharepoint User Name and
Password. If these are entered incorrectly, or unknown, the
application will crash with an error message no 4198.

Complete the merge
If all has been entered correctly the function will now run and split the merge into the document type(s) requested. As the process can take some time without much obvious sign of progress, I have added a progress indicator.

You may also select the folder to store the merged documents by clicking the 'Browse' button, which offers the standard Windows Explorer dialog. The browse button is not available for Sharepoint folder selection.
The add-in creates a series of new documents. It works best if these new documents are created using the template from which the merge document was created. If that template is not available, the new documents are created using the normal template. You can, if you prefer, use the normal template to create the documents, by un-checking the check box shown checked in the illustration above, or run the separate macro from the toolbar, as detailed earlier on this page, to create a version of the document c/w attached matching template.
Illegal, Missing and duplicated name filename field values
Earlier versions of the add-in would prompt for missing filenames. This has proved a nightmare to code with the changes I wanted to effect, and was also rather irritating in its previous guise, where several records may have had illegal or missing filenames, so I have simplified the function. Now when the filename field is empty or there is an illegal character in the field (see list below), a dummy filename name is substituted. This name is in the format - "NoName Record Number", where Number is the number of the merged record.
Where fieldnames have duplicated content, the fieldname of the first matching record is named in the format "Filename" whereas the subsequent matching records have an incremented number appended e,g, "Filename(1)", "Filename(2)" etc.
The illegal characters that the macro will not accept are, :- / \ : * ?" < > |
The macro will also reject the name if the first character is a period (full stop).
Merge to Individual PDF files
The Word add-in described above also provides the option to create PDF files.
With the Word 2003 version, PDF file creation requires the availability of the Adobe PDF driver from Adobe Acrobat or PDFCreator to be installed..
In early versions of Word 2007 the PDF plug-in was an optional extra. The add-in will only offer the Office 2007 PDF plug-in, Adobe PDF driver and PDFCreator 2 driver if they are available. The optional PDF plug-in will be available if Word 2007 is updated to SP2 as this removed the plug-in option and made it part of the application.
In Word 2010 and later, the PDF plug-in should always be available, and the functions to use Adobe Acrobat or PDFCreator as alternatives, if present, are retained.
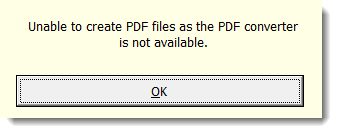
The macro detects whether the plug-in is installed by looking for EXP_PDF.DLL file in the folder %programfiles%\Common Files\Microsoft Shared\OFFICE14 (where 14 is the Office version), which is the active part of the plug in. If it is not installed, the add-in then checks whether the Acrobat printer driver Adobe PDF is installed, and if available will print to that. If neither is available a warning message is presented and the merge is made only to the choice of document format.
Adobe Acrobat
The Acrobat versions compatible with Word 2007 and later provide their own merge function which has greater functionality than is available from the Adobe PDF 'printer' driver or the Microsoft Office Plug-in, though not the ability to name the PDF files from the data source. If you have Acrobat installed, investigate this if you need to merge to PDF.
The Acrobat add-in also offers the option to merge PDF to e-mail attachments which the individual merge letters add-in does not include. However see also my Many to One add-in which does provide this functionality.
If you wish to employ the Adobe driver with this add-in, before executing the merge to a new document, select the Adobe PDF printer (from Control panel > Devices and Printers). Right click and select Properties and from the dialog box shown below click 'Printing Preferences'

Uncheck the "View Adobe PDF results" and "Prompt for Adobe PDF filename" items.
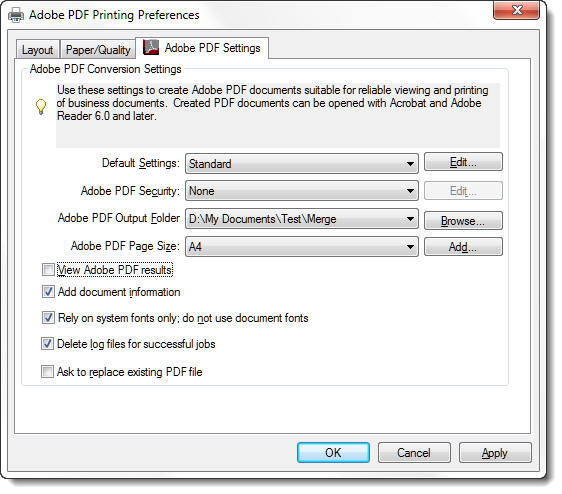
The illustration above is from Acrobat 10 (earlier versions of Acrobat have similar options).
Select the field in the datasource that will supply the filenames and check the box 'Do you want to create PDF files' in the dialog box shown below.
PDF Creator Version 2.5 (only)
In response to popular request, I have also included an option to create the PDF files using the Open Source PDFCreator. Where the PDFCreator driver is present, the PDFCreator button shown in the illustration above will be enabled.
The process has been configured to use
version 2.5 of
PDFCreator
and it will no longer work with the earlier version 1.7.3. nor
more recent versions and
attempting to do so may cause the process to
crash.
Note that
version 2.5 also includes PDF
Architect, which is not required, and unless you want this
application, I would recommend that you use the 'Expert'
installation settings and uncheck PDF Architect. Note also that
the installer will offer assorted plug-ins for your browser,
that are certainly not required. Make sure you de-select these
during the installation.
When merging to PDF format with PDFCreator the add-in additionally provides the option to engage PDF security measures. When the 'Continue' button on the main dialog is clicked, a second userform will open to offer that facility. Clicking 'Cancel' on this userform will cancel the whole process.
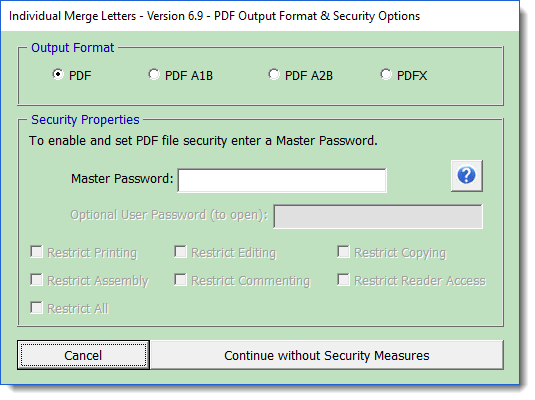
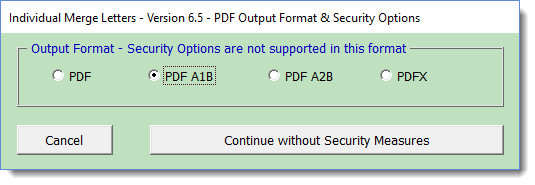
Currently the additional security options are only supported when the option PDF is checked. Should you check one of the other PDF format types, the dialog changes as shown below and any security settings entered are returned to their default values.
The items shown disabled in the illustration above become available when a Master Password is entered. If you don't want additional security measures then don't set a Master Password!
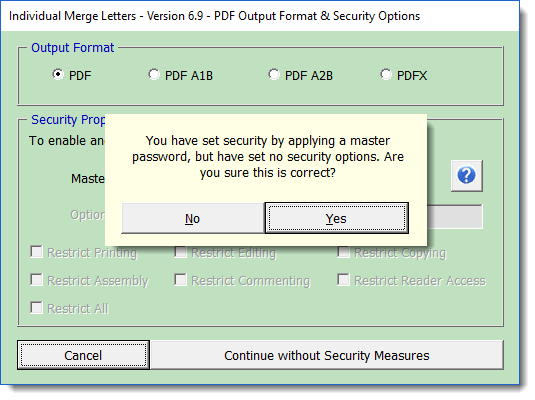
If you enter a Master Password and continue without setting options, you will see the following dialog. Click 'No' to set options or 'Yes' to continue without.
The PDF files are created in the same folder as the documents.
It has been observed that the processing
demands of very complex merge documents, can result in problems,
even to the extent of the add-in crashing Word completely.
If the document merges normally to a new document, but fails
with the Individual Merge Letters add-in try instead the Merge
and Split add-in, which employs a different process. This
version is also required if your merge document has merge fields
in the headers or
footers.
In cases where neither options provides satisfactory results, and provided the data source is an Excel worksheet that meets
the standards required by the add-in, you could try the
Many to One add-in using its one to one
mode, which emulates mail merge. This add-in does not
use mail merge, but processes each record as a separate task. The
final result can however be much the same.
There is a note on the Many to One
page that explains how to use it for this task.
 -
Click here to download the Individual Merge Letters add-in
-
Click here to download the Individual Merge Letters add-in
Print individual merge letters from a merged document - doing it the old way.
If you create a merge letter and merge to a new document without using the add-in to split the merge, you get one long document with each of the individual 'letters' separated by a section break.
It is simple enough to print an individual 'letter' or range of letters by addressing the sections in the print dialog as in the illustration below

Split the single merged document into separate letters.
Having merged to a single document, it is still possible to split to separate documents, with the use of a macro. To this end Doug Robbins also came up with the following, to which I have taken the liberty of making a couple of small changes.
The macro splits the document and files each sub document into the indicated path. The files are named by date and sequence number, with the date format from the mask. Both these variables can easily be changed to reflect personal preferences - nor should it be too difficult for those with vba programming skills and inclination to modify the code to prompt for a name and/or path.
' Based on a Macro created 16-08-98 by Doug Robbins
' to save each letter created by a
' mailmerge as a separate file.
Dim Mask As String
Dim Letters As Long
Dim Counter As Long
Dim DocName As String
Dim oDoc As Document
Dim oNewDoc As Document
Set oDoc = ActiveDocument
oDoc.Save
Selection.EndKey Unit:=wdStory
Letters = Selection.Information(wdActiveEndSectionNumber)
Mask = "ddMMyy"
Selection.HomeKey Unit:=wdStory
Counter = 1
While Counter < Letters
DocName = "D:\My Documents\Temp\Workgroup\" & Format(Date, Mask) _
& " " & LTrim$(Str$(Counter)) & ".doc"
oDoc.Sections.First.Range.Cut
Set oNewDoc = Documents.add
'Documents are based on the Normal template
'To use an alternative template follow the link.
With Selection
.Paste
.EndKey Unit:=wdStory
.MoveLeft Unit:=wdCharacter, Count:=1
.Delete Unit:=wdCharacter, Count:=1
End With
oNewDoc.SaveAs FileName:=DocName, _
FileFormat:=wdFormatDocument, _
AddToRecentFiles:=False
ActiveWindow.Close
Counter = Counter + 1
Wend
oDoc.Close wdDoNotSaveChanges
End Sub
As an alternative, the following macro provides the opportunity to provide the fixed portion of the filename and to change the path of the saved files:
' Macro created 16-08-98 by Doug Robbins to save each letter created by a
' mailmerge as a separate file.
' with modifications by Graham Mayor 16-06-03 & 08-10-04
Dim Title As String
Dim Default As String
Dim MyText As String
Dim MyName As Variant
Dim MyPath As String
Dim Letters As String
Dim Counter As Long
Dim docName As String
Dim oDoc As Document
Dim oNewDoc As Document
Set oDoc = ActiveDocument
oDoc.Save
Selection.EndKey Unit:=wdStory
Letters = Selection.Information(wdActiveEndSectionNumber)
Selection.HomeKey Unit:=wdStory
Counter = 1
Default = "Merged"
MyText = "Enter a filename. Long filenames may be used."
Title = "File Name"
MyName = InputBox(MyText, Title, Default)
If MyName = "" Then End
Default = "D:\My Documents\Test\"
Title = "Path"
MyText = "Enter path"
MyPath = InputBox(MyText, Title, Default)
If MyPath = "" Then End
While Counter < Letters
Application.ScreenUpdating = False
docName = MyPath & MyName & " " & _
LTrim$(Str$(Counter)) & ".doc"
oDoc.Sections.First.Range.Cut
Set oNewDoc = Documents.Add
'Documents are based on the Normal template
'To use an alternative template follow the link.
With Selection
.Paste
.EndKey Unit:=wdStory
.MoveLeft Unit:=wdCharacter, Count:=1
.Delete Unit:=wdCharacter, Count:=1
End With
oNewDoc.SaveAs FileName:=docName, _
FileFormat:=wdFormatDocument, _
AddToRecentFiles:=False
ActiveWindow.Close
Counter = Counter + 1
Application.ScreenUpdating = True
Wend
oDoc.Close wdDoNotSaveChanges
End Sub
If you are unsure how to use the above code, see
how to install macros
Patience!
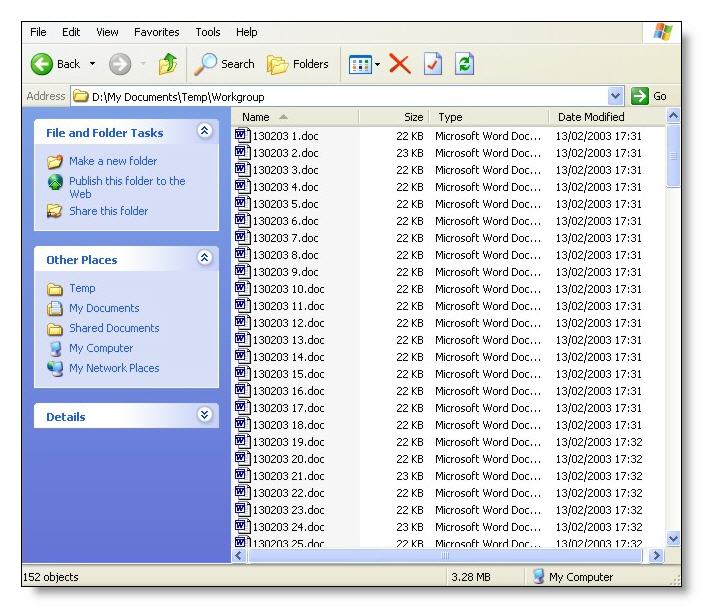
Note that as a merge document may contain hundreds of letters, this macro can take a while to run, as each document has to be opened and saved, but you should end up with a folder full of files as shown below (derived from the first code example):
Naming the file from the data source
This is easier said than done as, once the document is merged, the data file no longer forms part of the merge letters. There are a couple of approaches that may be considered, but the one I favour requires the field to be used as the filenames to be added to the top of the merge letter on a line of its own. When merged, the fieldnames will be those first lines of the merged letters. The macro then removes the lines to restore each merge letter to its required format during the splitting process.
The only proviso when choosing filename fields is to choose a combination that will produce a unique result. If duplicate filenames occur, the macro as written will simply overwrite the saved file with the new file of the same name.
The filename fields above are inserted in red for clarity - the colour applied does not affect the result. Following the merge (below), the fields are translated into a 'filename'.
When the macro is run, the filename fields are stripped out leaving the merge letters.
' splitter Macro modified to save individual letters with
' information from data source. The filename data must be added to
' the top of the merge letter - see web article.
Dim sName As String
Dim docName As String
Dim Letters As String
Dim Counter As Long
Dim oDoc As Document
Dim oNewDoc As Document
Set oDoc = ActiveDocument
oDoc.Save
Selection.EndKey Unit:=wdStory
Letters = Selection.Information(wdActiveEndSectionNumber)
Selection.HomeKey Unit:=wdStory
Counter = 1
While Counter < Letters
Application.ScreenUpdating = False
With Selection
.HomeKey Unit:=wdStory
.EndKey Unit:=wdLine, Extend:=wdExtend
.MoveLeft Unit:=wdCharacter, Count:=1, Extend:=wdExtend
End With
sName = Selection
Docname = "D:\My Documents\Test\Merge\" & sName & ".doc"
oDoc.Sections.First.Range.Cut
Set oNewDoc = Documents.Add
'Documents are based on the Normal template
'To use an alternative template follow the link.
With Selection
.Paste
.HomeKey Unit:=wdStory
.MoveDown Unit:=wdLine, Count:=1, Extend:=wdExtend
.Delete
End With
oNewDoc.SaveAs FileName:=docName, _
FileFormat:=wdFormatDocument, _
AddToRecentFiles:=False
ActiveWindow.Close
Counter = Counter + 1
Application.ScreenUpdating = True
Wend
oDoc.Close wdDoNotSaveChanges
End Sub
Split a merged document to the printer with each 'letter' treated as a separate print task
Where a merged document consists of several elements e.g. the first page of each merged letter should be printed on letter headed paper from a different printer tray, or the printer provides a stapling function for each 'letter', a frequently encountered problem is that the printer loses track of the tray assignments or in the case of the stapled document, the whole merge is treated as a single document. To overcome this problem, fellow MVP Doug Robbins, came up with a macro that treats each letter as a separate print task.
To use this macro, merge to a new document then use the macro to print that document.
' Macro created 16-08-98 by Doug Robbins to print each letter created by a
' mailmerge as a separate file.
Dim Letters as Long
Dim Counter as Long
Letters = ActiveDocument.Sections.Count
counter = 1
While counter < Letters
ActiveDocument.PrintOut Background:=False, _
Range:=wdPrintFromTo, _
From:="s" & format(counter), To:="s" & format(counter)
counter = counter + 1
Wend
End Sub
Create a template for the merge splitting macros
IMPORTANT!! Several of the macros featured on this page create their new split documents by using the default Normal template as a basis for the documents. If the merge source document has been created from a different template, with different margins or page size, the resulting split documents are not going to match the layout of the merge document. To overcome this issue, you could create an empty template, by deleting the content of the merge source document and save it as a template, then base the split documents on that template.
The add-in includes a function to create a template from the document upon which the following macro is based.
The following macro will create a template from the merged document called splitmerge.dot(x) which it will store in the default user template location.
To use the splitmerge.dot(x) template in the examples above, locate the line
Documents.Add
and replace it with
If Val(Application.Version) < 12 Then
Documents.Add Options.DefaultFilePath(Path:=wdUserTemplatesPath) _
& "\splitmerge.dot"
Else
Documents.Add Options.DefaultFilePath(Path:=wdUserTemplatesPath) _
& "\splitmerge.dotx"
End If
Dim sTempPath As String
Dim sQuery As String
Dim sRestore As String
Dim sATemp As String
Dim oSection As Section
Dim oStory As Range
Dim oMergeDoc As Document
If Documents.Count = 0 Then
MsgBox "No document present!" & vbCr & _
"Open the merged document and run this macro again", _
vbCritical, "Merge Template Creator"
Exit Sub
End If
Set oMergeDoc = ActiveDocument
If InStr(1, oMergeDoc, ".dot") Then
MsgBox "Active document is a template!" & vbCr & _
"Open the merged document and run this macro again", _
vbCritical, "Merge Template Creator"
Exit Sub
End If
sTempPath = Options.DefaultFilePath(Path:=wdUserTemplatesPath) & Chr(92)
With oMergeDoc
If Val(Application.Version) = 12 Then
.SaveAs FileName:="SplitMerge.docx", _
FileFormat:=wdFormatXMLDocument
Else
.SaveAs FileName:="SplitMerge.doc", _
FileFormat:=wdFormatDocument
End If
sRestore = .FullName
For Each oSection In .Sections
oSection.Range.Delete
Next oSection
For Each oStory In .StoryRanges
oStory.Delete
If oStory.StoryType <> wdMainTextStory Then
While Not (oStory.NextStoryRange Is Nothing)
Set oStory = oStory.NextStoryRange
oStory.Delete
Wend
End If
Next oStory
Set oStory = Nothing
With .PageSetup
.OddAndEvenPagesHeaderFooter = False
.DifferentFirstPageHeaderFooter = False
End With
If Val(Application.Version) = 12 Then
.SaveAs FileName:=sTempPath & "SplitMerge.dotx", _
FileFormat:=wdFormatXMLTemplate
Else
.SaveAs FileName:=sTempPath & "SplitMerge.dot", _
FileFormat:=wdFormatTemplate
End If
sATemp = .FullName
.Close SaveChanges:=wdDoNotSaveChanges
End With
Documents.Open sRestore
With ActiveDocument
.AttachedTemplate = sATemp
.Save
End With
End Sub
-
Click here to download the Individual Merge Letters add-in
Individual merge letters
Microsoft does not include a function to merge documents to separate files. The add-in featured on this page overcomes that limitation.
This add-in was inspired by a number of macros produced by fellow Word MVP Doug Robbins, which appear in modified form at the end of this page.